|
»Click here to display Table of Contents«
|

Batch Prepare Module |

|

|

|

|
|
Batch Prepare Module |
|
|

|

|
|
»Click here to display Table of Contents«
|
Batch Prepare Module |
|
|
|
|
|
Batch Prepare Module |
|
|
|
|
This tool is designed to reduce the amount of manual work involved in preparing a large number of modules by batch, and is invoked by right-clicking on a module in the Assembly browser and selecting Batch Prepare Module.
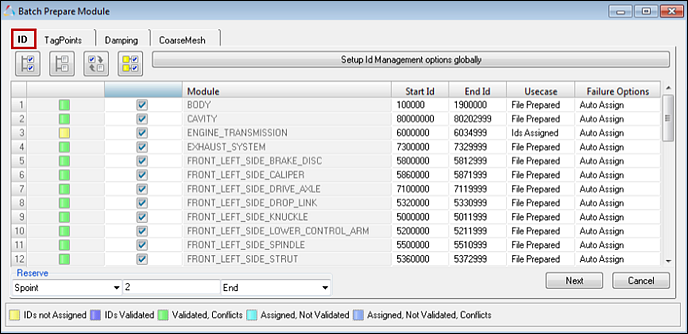
The ID tab provides options for you to define how to execute the ID management task for the selected modules. The column to the left indicates the current validation state of the corresponding module, and presents a checkbox that allows you to select to include the module in the batch ID management process. Also in the dialog are the Module, Start Id and End Id columns, along with two ID management columns, Usecase and Failure Options. The following use cases are available:
Two options are available for dealing with failure situations in executing the IDs assigned use case, such as IDs that are not actually available, IDs are available but are in conflict with those assigned to another module, or assigned IDs are insufficient to contain all entities.
A global reserve setting is available to reserve additional IDs for spoint or other purposes. |
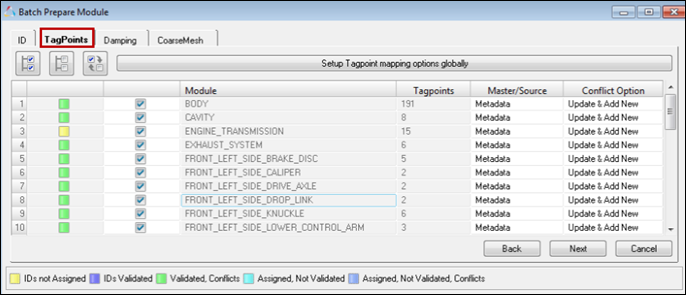
The TagPoints tab provides options for you to define how to execute the tagpoint validation task for the selected modules. The left column indicates the current validation state of the corresponding module, and presents a checkbox that allows you to select to include the module in the batch tagpoint validation process. Also in the dialog are the Module and Tagpoints columns, along with two tagpoint validation columns: Master/Source and Conflict Option. There are three options available in the Master/Source column:
There are also options available for reconciling potential conflicts in tagpoint data between assembly metadata and information in the module include file:
|
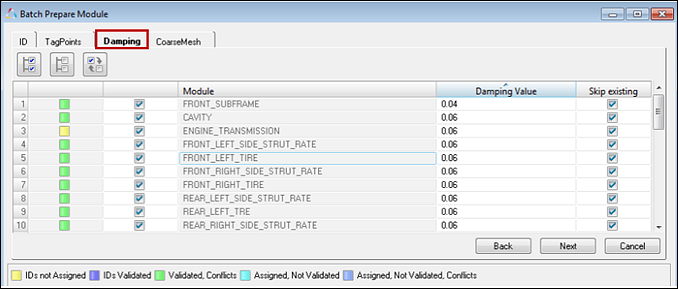
The Damping tab provides options for you to define damping to modules. The specified damping value will be used as global if the representation file does not have material damping or if the option for Skip existing is turned off. If the option Skip existing is turned on, the material damping value in the representation file will be used and the specified damping value will not be used. |
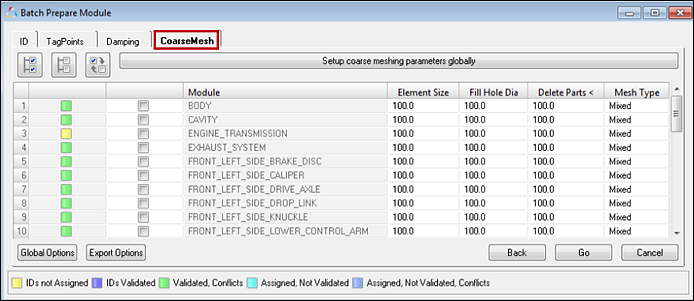
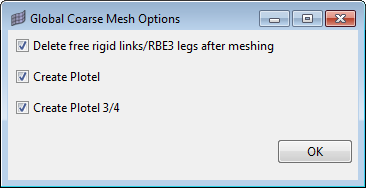
The CoarseMesh tab provides options for you to define parameters used to execute the coarse display mesh creation task for the selected modules. The left column indicates the current validation state of the corresponding module, and presents a checkbox that allows you to include the module in the batch coarse display mesh creation process. The tab also contains Element Size, Fill hole dia, Delete Parts< and Mesh Type columns where you can specify parameters specific to each module, if needed. Clicking Global Options allows you to specify additional meshing options that are used for all modules.
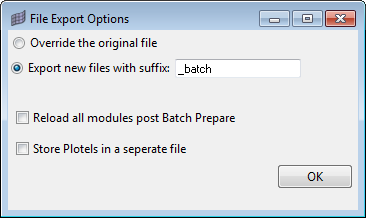
Clicking Export Options allows you to specify additional file export options that are used for all modules.
|