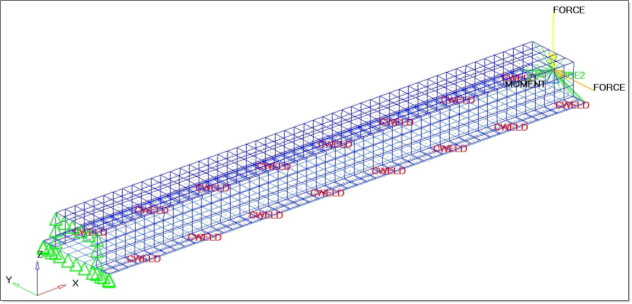
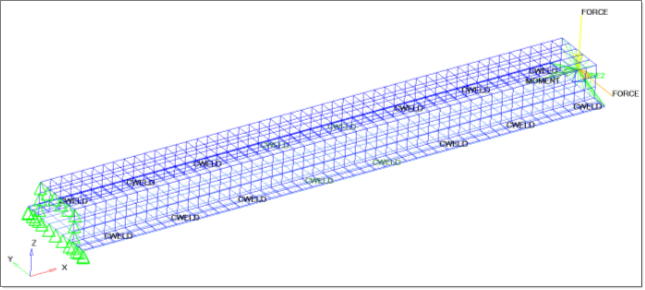
This tutorial demonstrates how to perform 1D topology optimization. The model is a simple welded hat section. The welding is modeled using CWELD elements.
The hut.hm file can be found in the optistruct.zip file and copied to your working directory. Refer to Accessing the Model Files.
The objective is to minimize the weighted compliance through all three load cases. The volume fraction of the weld component is limited to 0.3. The design space is the spot weld component.

The following exercises are included:
| • | Setting up the optimization problem |
| • | Post-processing the results |
Exercise
Step 1: Load the Model in the HyperMesh Desktop
| 1. | Start HyperMesh Desktop. |
| 2. | Choose OptiStruct in the User Profiles dialog and click OK. |
| 3. | From the File menu on the toolbar, select Open. |
| 4. | Select the hut.hm file you saved to your working directory from the optistruct.zip file. Refer to Accessing the Model Files. |
| 5. | Click Open. The hut.hm database is loaded into the current HyperMesh session, replacing any existing data. |
Step 2: Define the Design Space
| 1. | Go to the Analysis page. |
| 2. | Click optimization. This brings up the optimization module. |
| 4. | Set the radio button to create. |
| 8. | Select the box PWELD_500. |
| 10. | Click create. This defines the design space. |
Step 3: Define the Responses
| 2. | From the drop-down menu below response type:, select volumefrac from the list of responses that are available for optimization in OptiStruct. |
| 3. | Click on the toggle next to total and select by entity. The yellow selection box is now available. |
| 4. | Switch the yellow box to the props box. |
| 6. | Select the tick box PWELD_500. |
| 8. | Enter response = volfrac. |
| 9. | Click create. This defines the volume fraction response. |
| 10. | Enter response= wcomp. |
| 11. | Select the drop-down menu below response type: to open a window listing all responses available for optimization in OptiStruct. |
| 12. | Click weighted comp to select it as the response type and return to the response panel. |
(Click the arrow icon  to go to the second page, if necessary.)
| 14. | Turn on all three check boxes for the subcases. |
| 15. | Change the weighting factors for SUBCASE200 and SUBCASE300 to 100.0. This increases the influence of the two bending load cases vs. the torsion load case SUBCASE1, which is kept at 1.0. |
| 17. | Click create. This defines the weighted compliance response. |
Step 4: Define the Constraint and Objective
| 2. | Select response = volfrac. |
| 3. | Select the check box upper bound = and enter 0.3. |
| 4. | Enter constraint = volfrac. |
| 5. | Click create. This defines the volume fraction constraint. |
| 8. | Select response = wcomp. |
| 9. | Select min as the objective. |
| 10. | Click create. This defines the weighted compliance objective. |
| 11. | Click return. This concludes the definition of the optimization problem. Some optimization parameters should be modified to achieve a good result. |
| 13. | Select the check box DISCRT1D = and enter 20.0. This increases the penalty factor in the density method only for the 1D elements to achieve a discrete result. |
| 14. | Select the check box OBJTOL = and enter 1.e-5. This reduces the objective tolerance that is checked for convergence. |
Step 5: Perform the OptiStruct Run
| 1. | Click OptiStruct to enter the panel to run OptiStruct. |
| 2. | Click save as following the input file: field. |
| 3. | Select the directory where you would like to write the OptiStruct model file and enter the name for the model, hut_opt.fem, in the File name: field. The .fem file extension is suggested for OptiStruct input decks. |
The name and location of the hut_opt.fem file displays in the input file: field.
| 5. | Select export options: all. |
| 6. | Select run options: optimization. |
| 7. | Select memory options: memory default. The input file name should be hut_opt.fem. |
This will export the input deck and start the execution of OptiStruct in the solver GUI window.
Step 6: Visualize the New Spot Weld Configuration
To post-process the results, the weld elements will be sorted by density into different components.
| 1. | From the File menu on the toolbar, select Run > Command File. |
| 2. | Find the output hut_opt.HM.comp.cmf from your OptiStruct run. |
| 3. | Click Open. As a result, four of the welds are in the DENS 0.9-1.0 component; all others are in the DENS 0.0-0.1 component. |
| 4. | To do a re-analysis with the new weld configuration, undisplay the components with low density (DENS 0.0-0.1 to DENS 0.8-0.9) and rerun the analysis with export options: set to displayed in the OptiStruct panel. |

Final configuration.
See Also:
OptiStruct Tutorials


