Engineering Solutions

Entity Editor

Entity Editor

Previous topic Next topic Expand/collapse all hidden text  

Entity Editor

Previous topic Next topic JavaScript is required for expanding text JavaScript is required for the print function  

Use the Entity Editor to quickly view and edit entities in a model and correctly setup solver information. The Entity Editor can be accessed from the Model, Reference, and Solver browsers. In the Model browser, the following view modes are supported: Model, Include, Component, Property, and Material. When accessing the Entity Editor from the Reference browser, you will only be able to view your entity selection's corresponding data in a non-editable form.

The Entity Editor opens when you create new entities, as well as duplicate, edit, or select single or multiple entities in the browser. To expand and collapse the Entity Editor, click ee_collapse_expand in the top, right-hand corner. To adjust the height of the Entity Editor, drag sash_ee up and down.

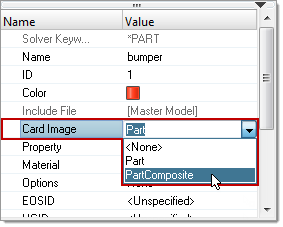
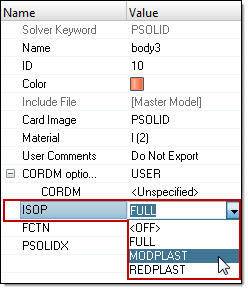
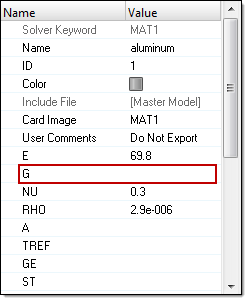
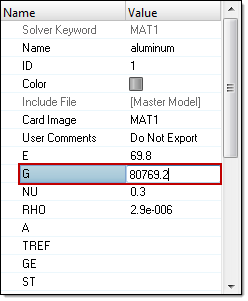
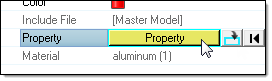
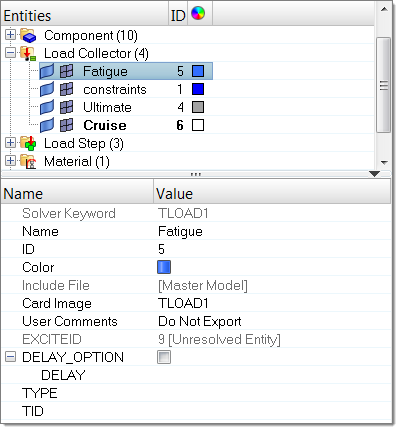
Entity parameters are displayed in the Name column, and the values associated with each parameter are displayed in the Value column. The parameters that display in gray text, cannot be edited. Once you edit an entity in the Entity Editor, the changes will be automatically applied throughout your model.

ee

hmtoggle_plus1greyEditing Multiple Entities

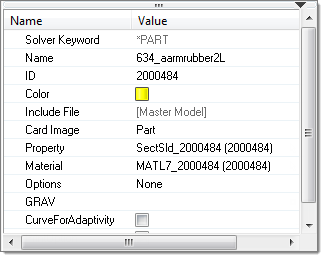
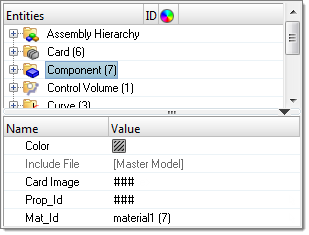
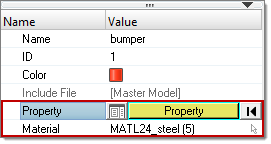
If you select multiple entities in the browser, the Entity Editor opens and displays the selected entities common corresponding data. The rows that contain ###, indicate that these fields do not contain common data, but can still be modified. When you modify the data, both common and ambiguous, HyperMesh applies the changes to all of the selected entities.

To select multiple entities in the browser, press SHIFT and begin selecting entities.

In the image below, seven components are selected, and the Entity Editor displays their common corresponding data. The Color, Card Image, and Prop_Id are different, therefore you see ###. The Mat_Id is the same for all of the selected components, therefore you see the material name and its ID.

ee2


hmtoggle_plus1greyEditing HyperMesh Specific Data

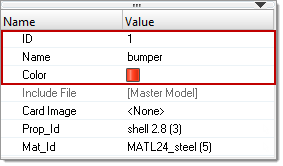
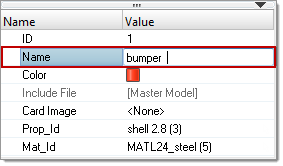
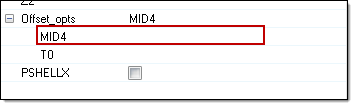
When you create an entity, it is assigned an unique ID, name, and color. Use the Entity Editor to edit this data.

editing_nonsolverdata

How Do I

1.Click Name, and enter a new name for the entity in the editable field.

ee_edit_name

2.Press Enter. HyperMesh updates the changes in the Entity Editor and browser automatically.
3.Repeat steps 1 and 2 to edit the entity's ID.


1.For Color, click the color box.
2.From the color pallet, select a new color to represent the entity. The entities color changes in the Entity Editor, browser, and graphics area.

ee_color


hmtoggle_plus1greyEditing Solver Specific Data (Template Data)

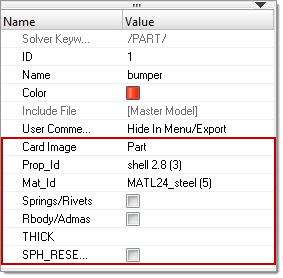
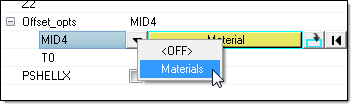
Every entity is assigned solver specific data. In HyperMesh 12.0 and earlier, you are able to edit this data using a combination of panels and the card editor. In HyperMesh 13.0, you can edit this data using the Entity Editor.

ee_solver_specific data


How Do I

In the Entity Editor, you can assign a card image to an entity. The card images you are able to assign to an entity will depend on the user profile you have loaded and the entity type you have selected in the browser.

To assign a card image:

1.Click Card Image.
2.Select a new card image from the drop-down list. The entity's card image changes, and the Entity Editor displays additional solver related fields.

ee_card_image


In the Entity Editor, certain fields can be turned ON and OFF. To turn a field OFF, remove its corresponding value or select OFF from the drop-down list. If you hover over a field that is turned OFF, its default value will appear in the Value column. To turn a field ON, enter a new value or select a value from the drop-down list. When a field is turned ON, its corresponding value will always be displayed in the Value column.

In the example below, assume that initially the field ISOP is turned OFF and has a default value of FULL. To turn the field ON, click its corresponding Value field and select a value from the drop-down list. If you want to turn the field OFF, select <OFF> from the drop-down list.

ee_default_value

ISOP field turned OFF

ee_default_value2

ISOP field turned ON

In the example below, assume that initially the field G is turned OFF and has a default value of 80769.2. To turn the field ON, click the Value field and press ENTER. To turn the field OFF, delete the value and press ENTER. If you turn the field OFF, the Entity Editor will retain the previous value you specified.

ee_double_value_editor

NU field turned OFF

ee_double_value_editor2

NU field turned ON

In the example below, assume that initially the field MID4 is turned OFF. You can turn the field on and then assign it a material. To turn the field ON, click its corresponding Value field and select materials from the drop-down list. You can then click the yellow selector button and select a material to assign to the field. If you want to turn the field OFF, select <OFF> from the drop-down list.

ee_selector_on

MID4 field turned OFF

ee_turn_selector_on

MID4 field turned ON

In HyperMesh 12.0 and earlier, certain card image fields can be turned ON and OFF by clicking the field heading in the Card Editor. When a field is turned ON, an additional field appears under the field heading, from which you can enter or select a value.

In example below, the card image MAT1 is displayed for a material in OptiStruct. By default, the field G is turned OFF. To turn the field ON, click its field header. The default value is displayed under the field heading.

ee_card_editor

MAT1 Card Image with the field G turned OFF

ee_card_editor2

MAT1 Card Image with the field G turned ON

When defining data in tables, certain fields can be turned ON and OFF. To turn a field ON, right-click on the heading of the disabled field and select Status. In the image below, the NO field is being turned ON for the load collector TSTEP.

ee_table_status_fields


In the Entity Editor, you can assign certain entities to another entity or a group of entities. For example, you can assign a property to a component. When an entity has an entity assigned to it, the name and ID of the assigned entity will be displayed in the Value field. If an entity does not have an entity assigned to it, the Value field will display <Unspecified>.

In the image below, the Entity Editor is open for the component bottom_bracket. The material aluminum is assigned to the component, and a property has not yet been assigned.

entity_selection_ee

In the Entity Editor, you can assign an entity using the Select dialog or the Entity Selector.


Method 1: Assign Entities Using the Select Dialog

1.Click the entity's corresponding Value field.
2.Click the yellow selector.

ee_yellow_selector

3.In the Select dialog, select an entity.
Tip:You can search for entities in the Select dialog, by entering their name, ID, or card image in the search field. When you click ee_search or press ENTER, the dialog only displays the entities that match your search string.

ee_selection_list_dialog

Or

In the graphics area, select an entity. HyperMesh automatically selects the entity in the Select dialog.

ee_graphics_area_selection

4.Click OK.


Method 2: Assign Entities Using the Entity Selector

1.Click the entity's corresponding Value field.
2.Click ee_selection_button.
3.In the panel area, click the yellow selector.

ee_selector_panel

4.In the panel area, select an entity and click return.

ee_panel_selection

Or

In the graphics area, select a entity. HyperMesh outlines your selection in white.

ee_graphics_area_selection1

5.Click proceed.


The import and export of unresolved entity IDs is supported, in a limited way. If you have an unresolved entity ID which is referenced by other entities, the Entity Editor displays the phrase "Unresolved Entity" in the Value field of the unresolved entity.

In the image below, the load collector Fatigue refers to a load collector with id=9, which is unresolved.

ee_unresolved

To resolve unresolved entities:

1.Right-click on the Name field of the unresolved entity, and select Clear unresolved entity from the context menu.
2.Click the entity's corresponding Value field.
3.Click the yellow selector.
4.In the Select dialog, select a new entity.
5.Click OK.


hmtoggle_plus1greyKeyboard Shortcuts

The following keyboard shortcuts are available in the Entity Editor:

Function Key

Description

Tab

Moves from one row to the next in the Entity Editor.

Shift+Tab

Moves to the previous row in the Entity Editor.

Space bar

Activates the Value field of the selected row.

keyboard_up_downa_arrows

Move up and down in the Entity Editor, a list of options in drop-down menus, or in a right-click content menu.

Enter

Accepts the changes made to a parameter in the Value field, or selects an option in a right-click content menu.

Esc

Dismisses the changes made to a parameter in the Value field, or closes a right-click context menu.


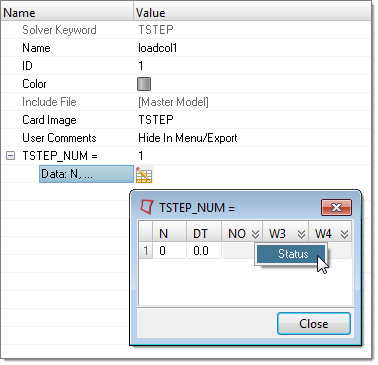
Advanced Entity Editor options can be accessed from the right-click context menu.