You can access advanced Entity Editor options in the context menu, when you right-click on certain fields. The options available in the context menu will depend on the entity that you select in the browser, as well as the field you right-clicked on. Use the Entity Editor's context menu to:
The Entity Editor context menu contains three display tools:
| • | Show - turn an entity's display off in the graphics area. |
| • | Hide - turns a hidden entity's display on in the graphics area. |
| • | Isolate - isolates an entity in the graphics area and hide all of the other entities in the model. |
|
In the Entity Editor, you can:
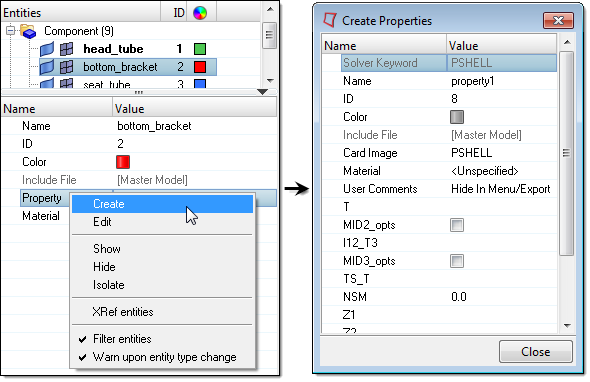
To create and assign a new entity to an entity or a group of entities:
| 1. | Right-click on the entity assignment field and select Create from the context menu. |
| 2. | In the Create dialog, define the new entity. |
| 3. | Click Close. The Entity Editor creates and assigns the new entity. |
|
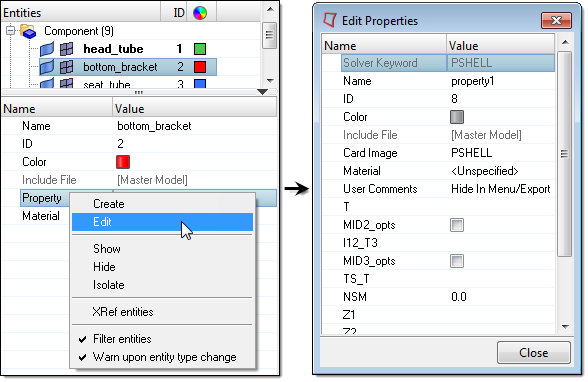
To edit an entity that is assigned to an entity or a group of entities in the Entity Editor:
| 1. | Right-click on the entity assignment field and select Edit from the context menu. |
| 2. | In the Edit dialog, modify the entities data. |
| 3. | When you are finished making changes, click Close. |
|
|
In the Entity Editor, you can:
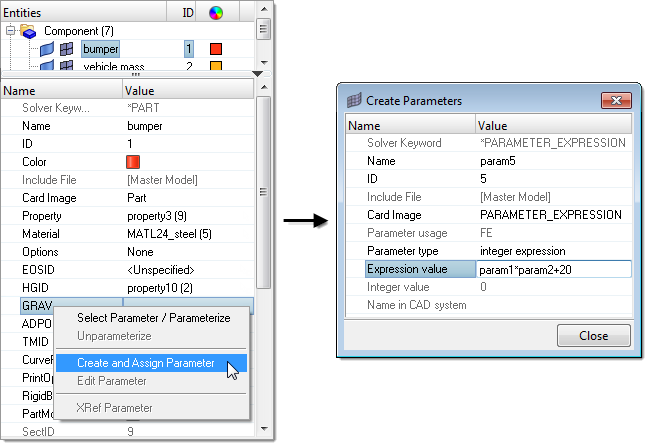
In the LS-DYNA and RADIOSS user profiles, certain entities can be defined with parameters. To create and assign a new parameter to an entity in the Entity Editor:
| 1. | Right-click on the parameter assignment field and select Create and Assign Parameter from the context menu. |
| 2. | In the Create Parameter dialog, define the new parameter by changing the Parameter type and Expression value. When the Card Image and Parameter type are set to expression, the Expression value field becomes active. |
| Note: | The Entity Editor currently supports the following types of parameters: Double, Integer, Double Expression, and Integer Expression. |
| 3. | In the Expression value field, enter a valid expression value. |
| 4. | When you are finished defining the parameter, click Close. The Entity Editor creates and assigns the parameter to the selected entity. |
| Note: | These parameters can be used in HyperStudy for design exploration and optimization. |
|
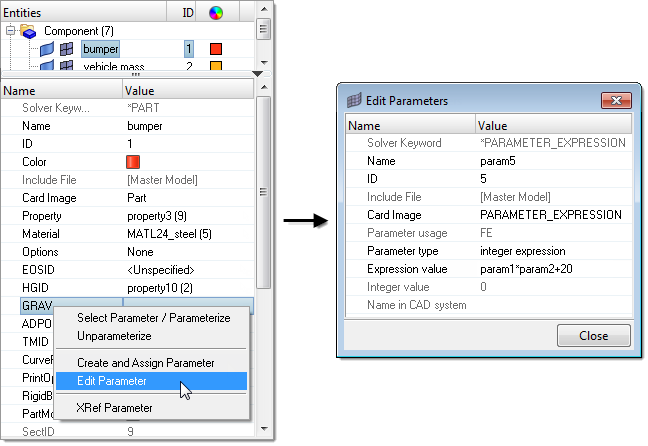
To edit a parameter that is assigned to an entity in the Entity Editor:
| 1. | Right-click on the parameter assignment field and select Edit Parameter from the context menu. |
| 2. | In the Edit Parameter dialog, modify the parameter's data. |
| 3. | When you are finished making changes, click Close. |
|
|
In the Entity Editor, you can:
For any solver entity, you can parameterize most of the solver template data of a numeric value. To parametrize solver data:
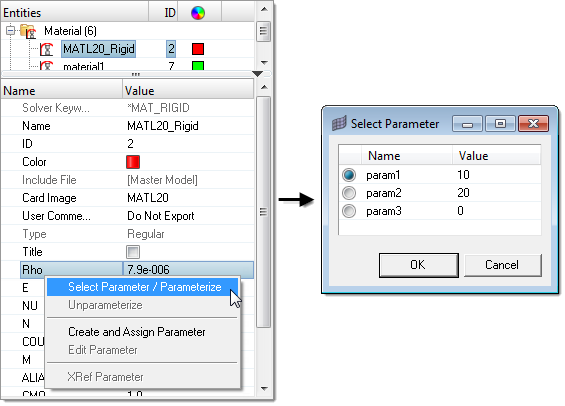
| 1. | Right-click on the solver data field and select Select Parameter/Parameterize from the context menu. |
| 2. | In the Select Parameter dialog, select a parameter from the list of valid types. |
In the image below, the parameter Rho is being parameterized with the parameter param1.
|
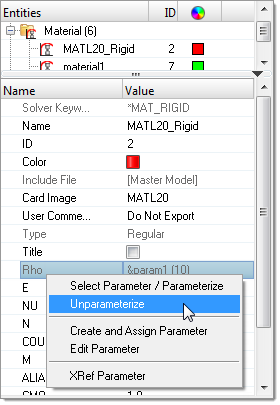
When a solver data field is parameterized, you can unparameterize it or assign it a different parameter. To unparameterize a solver data field, right-click on the field and select Unparameterize from the right-click context menu.
In the image below, the parameter Rho is being unparameterized with the parameter param1.
|
|
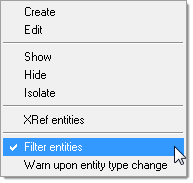
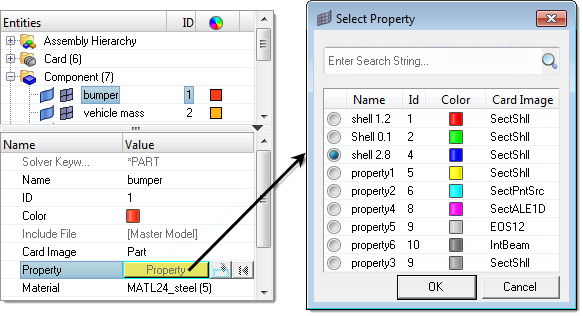
To filter the entities that are not applicable to the entity displayed in the Entity Editor, activate the entity filter in the right-click context menu. When off, all of the entities available in the model will display in the Select dialog or Entity Selection panel.
In the image below, the Entity Editor is activated for the component bumper, which is of type *PART. For this example, assume that the Filter is activated. If you were to assign a property to this component using the Select dialog, seven properties would be available, even though the model contains a total of nine. The two properties that are filtered out cannot be assigned to a *PART of LS-DYNA. The Status bar also displays a message that says seven of nine properties are being filtered using a filter criteria, and in this case it is an IdPool filter.
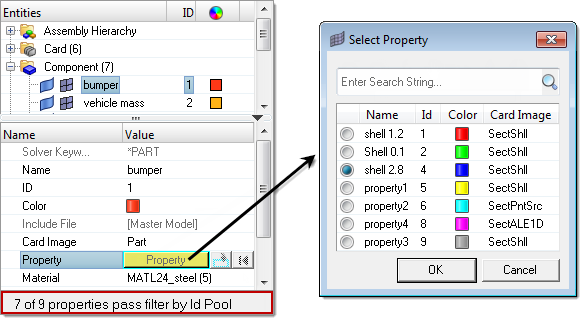
If you deactivate the filter, the Select dialog will display all of the properties in the model.
|
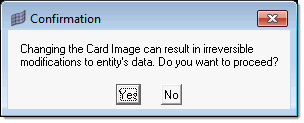
Any changes that you make in the Entity Editor will be automatically applied. Some of the changes may be irreversible. To confirm changes before they are made, activate the Warn upon entity type change option in the right-click context menu. When this option is activated, a Confirmation dialog will appear every time you make a change in the Entity Editor. To proceed, you must click Yes or No. By default, the Warn upon entity type change option is activated. If you do not want to display this message every time you make a change, you can deactivate this option.
|
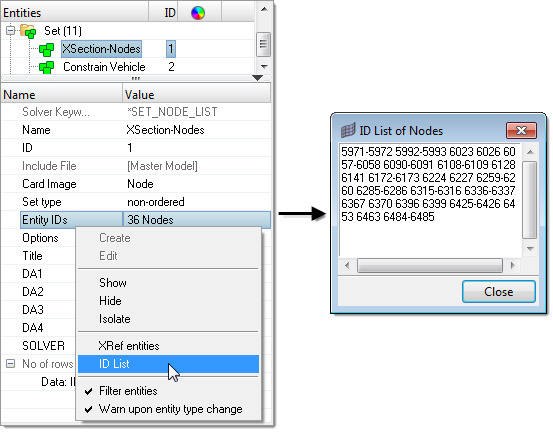
Set entities are used to define and store lists of entity IDs for a specific entity. Sets can be generated for nodes, elements, components, assemblies, properties, materials, ellipsoids, multibody planes, multibody joints, and multibodies which contain entity IDs for that specific entity. In the Entity Editor, you can view an ID list for set entities. The entity IDs are compacted using ranges, and segregated using ID pools. If some of the IDs are unresolved, than they will be listed separately under Unresolved IDs.
To view a list of entity IDs for a specific entity:
| 1. | Right-click on the Entity IDs field and select ID List from the context menu. |
| 2. | In the ID List dialog, review a list of all of the entity IDs. |
| 3. | When you are finished, click Close. |
|
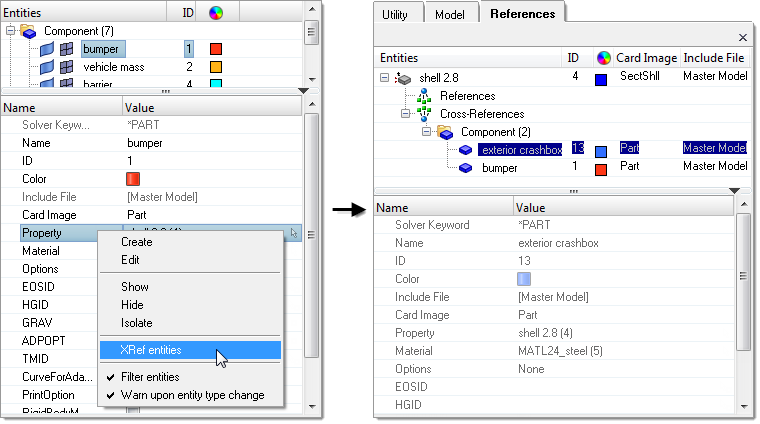
To open the Reference browser and view a hierarchical tree structure that displays the relationship of a selected entity in the Entity Editor to other entities and parameters in the model, right-click on a field and select Xref entities from the context menu.
In the image below, the Reference browser displays the entities related to the Property entity of the component bumper. If you select an entity from the Reference browser, the Entity Editor will open and display your entity selection's corresponding data in a non-editable form.
|


