Use the Drag panel to create a surface and/or mesh by dragging a series of nodes or lines, or to create elements by dragging selected elements. The function drags the selected entities along the specified vector creating a mesh, surface, or elements along that vector.
Examples
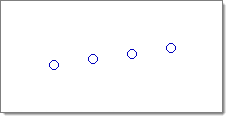
Nodes are selected
|
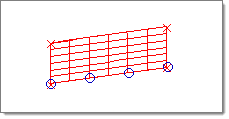
Nodes are dragged
|
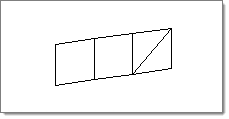
Elements are selected
|
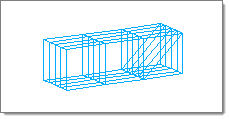
Elements are dragged
|
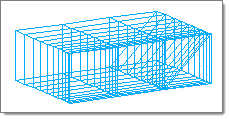
The elements in this illustration were created by using drag + with a positive bias intensity value.
|
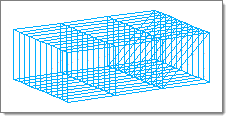
The elements in this illustration were created without element biasing.
|
Subpanels and Inputs
The Drag panel contains the following subpanels and command buttons:
A line segment can be used if desired.
The order in which the nodes are selected determines the connectivity of the mesh generated.
Panel Inputs
Input
|
Action
|
entity selector
|
Use this button to select whether to drag nodes or lines.
|
vector selector
|
Specify the direction along which to drag the nodes/line.
|
distance = / distance = N2- N1
|
Select which method to use for the distance to drag. If you select distance = , enter a value in the field.
|
mesh, keep surf
|
mesh, keep surf: creates a surface from the selected entities and then generates a mesh on the created surface. The created surface is retained along with the mesh.
mesh, dele surf: creates a surface from the selected entities and then generates a mesh on the created surface. The created surface is then deleted and only the corresponding mesh is retained.
mesh w/o surf: This option creates a mesh between the selected entities using linear interpolation without creating a surface.
surface only: creates a surface from selected entities, but does not create a mesh. You can use the resulting surface to perform any desired geometry cleanup functions or automeshing.
|
|
When one-dimensional elements are dragged, two-dimensional elements are generated. When two-dimensional elements are dragged, three-dimensional elements are generated. Three-dimensional elements are ignored by the drag operator.
Panel Inputs
Input
|
Action
|
entity selector
|
Use this button to select the elements to drag.
|
vector selector
|
Specify the direction along which to drag the elements
|
distance = / distance = N2- N1
|
Select which method to use for the distance to drag. If you select distance = , enter a value in the field.
|
on drag =
|
Number of elements which should be generated along the drag
|
bias style
|
Select linear, exponential or bellcurve.
|
bias intensity
|
This affects how strong the biasing effect is. Larger numbers create stronger bias.
|
|
The following action buttons appear throughout the subpanels:
Input
|
Action
|
drag +
|
Drag the selection in a positive direction.
|
drag -
|
Drag the selection in a negative direction.
|
reject
|
Click reject immediately after the surface, mesh, or elements have been created. To re-create the surface, mesh, or elements, click drag+ or drag- a second time without changing any of the input data. The input entities used to create the surface, mesh, or elements are restored provided that no data have been selected since they were created.
|
return
|
Exits the panel.
|
|


