|
»Click here to display Table of Contents«
|

connector imprint |

|

|

|

|
|
connector imprint |
|
|

|

|
|
»Click here to display Table of Contents«
|
connector imprint |
|
|
|
|
|
connector imprint |
|
|
|
|
Use of the mesh edit - connector imprint panel is generally only required when sets of connectors with quad transitions are located too close to each other for the specified mesh size.
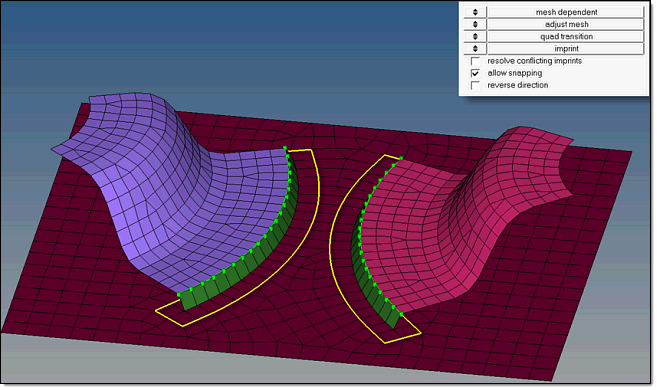
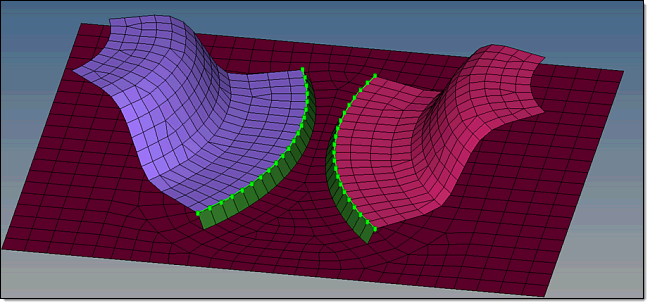
The Problem: Conflicting Transitions Prevent Connector RealizationIn the picture below, the regular quad mesh can be easily performed. There is enough space available and the quad transition areas don’t conflict each other.
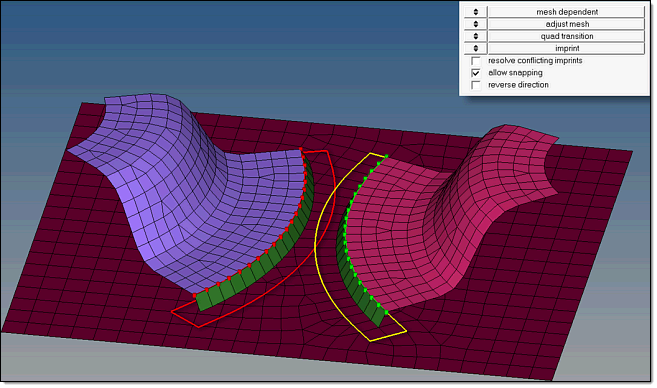
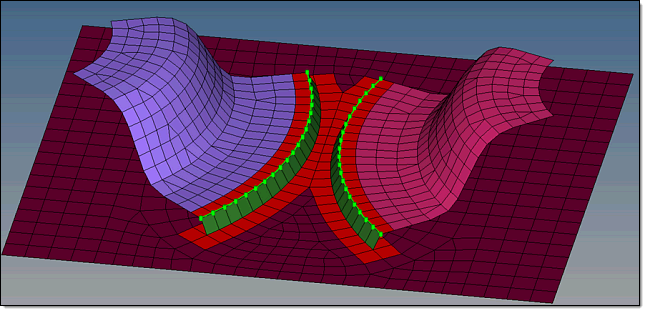
However, when the components are brought closer together, the realization fails because the transition areas conflict with each other:
Smaller conflicts can be resolved automatically by the resolve conflicting imprints option when realizing the connectors. This releases the overlapping elements and performs a normal remesh in that area. This is permitted as long as the overlapping area is smaller than half the regular quad transition element size:
However, if a conflict is too great it cannot be resolved in this fashion. For such cases, the mesh edit - imprint functionality can be used to solve the problem.
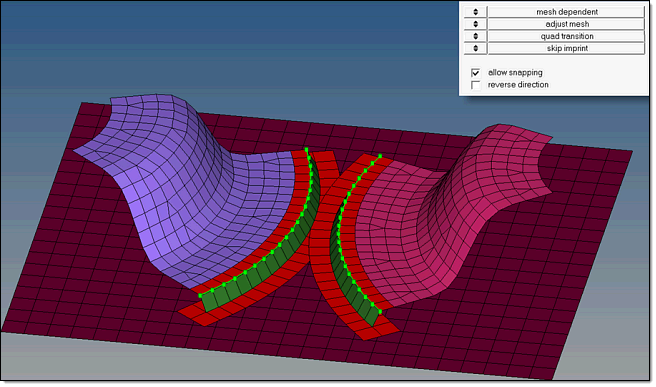
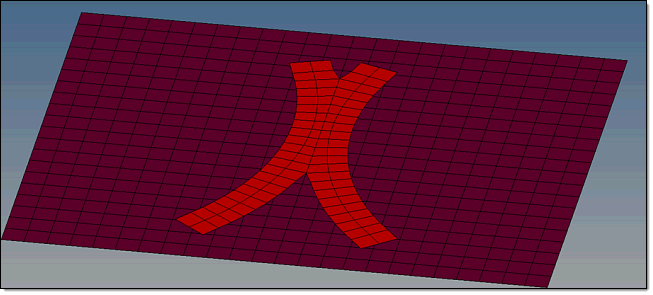
The Solution: Manual Mesh ImprintIdeally all connectors expected to conflict with each other are realized with the skip imprint option in a first step. This creates the weld elements and the mesh pattern for each connector. The pattern elements are organized into a component named ^conn_imprint.
In the second step, the conflicting elements can be manually modified with all of the functions that Engineering Solutions provides.
In a third step the manual mesh imprint is performed. The elements from the ^conn_imprint component are selected as the source and the elements from the affected components are selected as destination mesh.
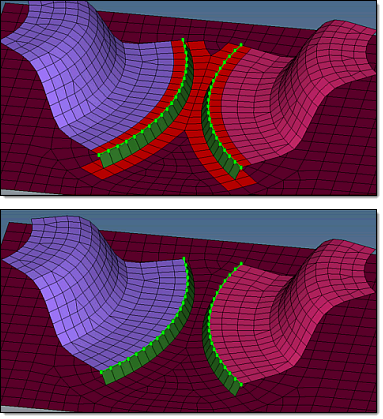
By activating the checkbox elems to destination comp the elements from the ^conn_imprint components are automatically organized into the appropriate destination components:
|
The panel includes collectors for specifying the imprint mesh (source) and the destination mesh, as well as an option to determine which components the imprint will be organized into. There are additional settings to be made; for further details see the mesh edit panel.
This screenshot displays the recommended panel settings for mesh imprint in combination with connectors:

Input |
Description |
||
Source |
The elements selected in this field will be imprinted into the destination mesh when the imprint is performed. |
||
Destination |
The elements which are intended to assimilate the imprint mesh are selected in this field. |
||
Elems to destination comp |
This checkbox determines whether the imprint elements should remain in their origin component or be organized into the appropriate components of the destination mesh.
In the top image, the organize checkbox is left blank; in the bottom image, it is |
||
Create |
Applies the imprint based on the provided input. |
||
Reject |
Reverses the last imprint action.
|
||
Return |
exits the connector imprint panel. The current state of the imprint is saved, but the entry option settings are not. |