In this tutorial you will:
| • | Determine the commands to create constraints on a plane |
| • | Create a Utility Menu macro to execute the commands |
| • | Create a new button on the User page of the Utility Menu to run the macro |
Tools
In order to execute command file commands or Tcl scripts from a button on any of the HyperMesh Utility Menu pages, a Utility Menu macro must first be defined. A Utility Menu macro contains valid command file or templex commands that execute the appropriate operations, and is defined using the *beginmacro and *endmacro commands. Macros may accept data passed to them using the arguments $1, $2, etc. Each argument specifies where the values should be substituted. These macros are defined within the .mac files, including the userpage.mac file.
The following skeleton code shows the format of a Utility Menu macro:
*beginmacro(macroname)
command statements go here
*endmacro()
Utility Menu macros consist of HyperMesh Tcl modify commands.
Load collectors can be created and edited using the Model Browser. Simply right-click in the Model Browser and select Create > Load Collector to create one. To edit the name, color, or card image of a load collector, right click on the load collector name in the Model Browser and select Edit
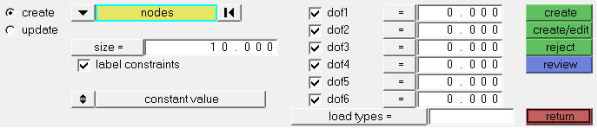
The Constraints panel can be accessed from the menu bar by selecting BCs > Create > Constraints
The Constraints panel allows you to create and update constraints.
Exercise
In this exercise you will create a Utility Menu macro from a command file that creates constraints on a plane and add a button on the User page that will launch the macro:
| 2. | Delete the existing command.cmf file. This file is located in either the start-in directory or the current working directory. |
| 3. | Perform the operations in HyperMesh that the script should run. |
| 4. | Extract the commands from the command.cmf file. |
| 5. | Add them to the userpage.mac file. |
| 6. | Modify as necessary and add macro wrapper commands *beginmacro and *endmacro. |
| 7. | Add macro button using *createbutton that calls the new macro defined in Step 6. |
| 8. | Reload the current .mac file into HyperMesh to load the modified userpage.mac. |
Step 1: Define the task.
The first step in creating a macro is to define the process you want to automate and recognize the individual tasks to reach the desired conclusion. Here, you want to create a one-button macro to automatically create constraints on certain nodes. The actions necessary to complete this task are:
| • | Create a load collector for the constraints. |
| • | Enter the Constraints panel. |
| • | Apply constraints to the nodes on the end of the beam lying in the YZ plane. |
Step 2: Delete the existing command.cmf file.
The current command.cmf file is located in the current working directory. When first opening HyperMesh, the file is created in the directory HyperMesh is launched from. As soon as you begin working in HyperMesh all executed commands are written to the command.cmf file. If the file already exists, the commands are appended to the file. Deleting the file allows HyperMesh to create a new file and allows the user to easily find the relevant commands.
Step 3: Perform the operations in HyperMesh.
Execute the full process within HyperMesh. Every command issued in HyperMesh appears in the order executed and is reflected in the command.cmf file.
| 1. | From the menu bar, select File > Open > Model and load the file, c_channel-tcl.hm. |
| 2. | Right click in the Model Browser and select Create > Load Collector. |
| 3. | In the Name field enter the name constraints. |
| 5. | Open the Constraints panel. |
| 6. | Active the create subpanel. |
| 7. | Click nodes and select the on plane option. |
The plane that will be selected is the YZ plane. This is accomplished by selecting the x-axis vector, which is normal to the YZ plane. The base node option is then highlighted, allowing a node on one end of the beam to be selected as the base node for the plane. All nodes on that plane are highlighted when select is clicked.
Step 4: Extract the commands from the command.cmf file.
| 1. | Open the command.cmf file using any text editor. |
| 2. | Select and copy all lines in the file. |
Observe the *createmark command and the list of entity ID numbers. A mark is a storage buffer in HyperMesh. For some actions performed on entities, the entity ID is first entered into the designated mark.
There are two marks available to the user (1 and 2) for each entity type (elements, nodes, lines, surfaces, points, etc…). At the execution of the command using the mark, the changes apply to all entities identified in the mark.
Step 5: Add the commands to the userpage.mac file.
| 1. | Open the userpage.mac file using any text editor. |
| 2. | Paste the commands copied from the command.cmf file inside the userpage.mac file. |
Step 6: Modify as necessary and add Utility menu macro wrapper commands.
| 1. | Enclose the commands in Step 5 between the wrapper commands *beginmacro and *endmacro. In the *beginmacro command, name the macro macroEdge_Const as shown, following. Remove any lines copied from the command.cmf file that are not shown in the following. |
*beginmacro(macroEdge_Const)
*collectorcreate(loadcols,"constraints","",11)
*createmark(nodes,1) 3358-3360 3296 3297 3142 etc …
*loadcreateonentity_curve(nodes,1,3,1,0,0,0,0,0,0,0,0,0,0,0)
*endmacro()
The macro name macroEdge_Const will be used to connect the button with the macro via the macroName field in the *createbutton command.
| 2. | Change the *createmark(nodes,1) command to *createmark(nodes,1) "on plane" 0 0 0 1 0 0 0.5 1 0 |
"on plane" is one of many selection methods available. This method allows the selection of only entities that lie within a tolerance (in this case, 0.5) of the plane defined at the point (0,0,0) with normal vector (1,0,0). In this exercise, this is the YZ plane. See the Entity Selector online help topic for further details.
The final macro should look like:
*beginmacro(macroEdge_Const)
*collectorcreate(loadcols,"constraints","",11)
*createmark(nodes,1) "on plane" 0 0 0 1 0 0 0.5 1 0
*loadcreateonentity(nodes,1,3,1,0,0,0,0,0,0)
*endmacro()
| 3. | Save the userpage.mac file. |
Step 7: Add the macro button.
Create a button on the User page to execute the macro.
| 1. | Create a new button in the userpage.mac file. |
*createbutton(5,"Edge Const",18,0,10,GREEN,"Add constraints to outer edge of elements","macroEdge_Const")
This creates a button on page 5 (User page), names it, places it in the 20th row, starts it at column 0, makes it 10 columns wide, gives it the color green, provides a help string and references the macro macroSave defined in Step 6.
| 2. | Save the userpage.mac file. |
Step 8: Reload the current .mac file into HyperMesh to load the modified userpage.mac.
To reload the current macro menu .mac file while HyperMesh is open, select Preferences > Menu Config from the menu bar and click on retrieve next to macro file. Make sure to load the proper .mac file from the hm\scripts\<profile name> directory based on the current user profile, or load the default hm.mac in hm\bin\<platform> if no user profile is loaded.
Step 9: Test the macro.
| 1. | Click the User button on the Utility Menu. |
The new button labeled Edge Const should be on the User page.
| 2. | Click this button to run the macro that automatically creates constraints on the outer row of nodes. |
Some commands used in this exercise are very model-specific. For example, creating a load collector named “constraints” may cause an error if the collector already exists. Also, selecting nodes using the by plane option and specifying the YZ plane may not be applicable to a lot of situations.
Several options exist to make the *createmark commands general enough to work with any model. For example, to select all the currently displayed elements in the model use the command *createmark(elements,1) "by displayed".
Another option is to replace the *createmark command with *createmarkpanel. When executed, this command presents the user with a selection panel for the entity specified. For this macro, the *createmarkpanel command could be used to allow the user to select the appropriate nodes.
Additionally, this Utility Menu macro could be converted to a Tcl script that allows for additional logic and error checking controls. This way, the user could also be prompted to enter a name for the load collector using hm_getstring. An error check could then be performed to determine if that load collector already exists, and appropriate action would then be taken.
See Also:
HyperMesh Tutorials


