The objective of this tutorial is to show how to use the Multi-Domain technique. For more information on this technique, refer to Multi-Domain.
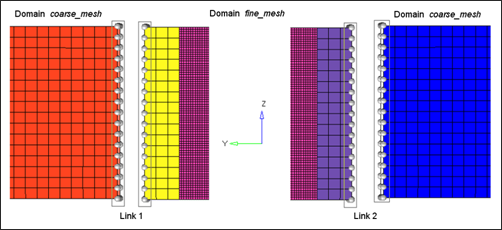
The model used is a low speed pole impact on a bumper system. Note that the model is finely meshed (average mesh size = 2mm) in the region of the pole impact and coarsely meshed (average mesh size = 10mm) elsewhere.
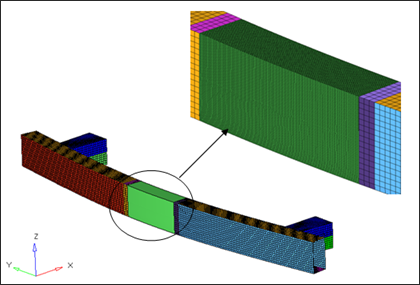
In order to run this analysis using Multi-Domain technique, we have to split this model into two domains, one containing the finely meshed region and the other containing the rest. A node to node link (/LINK/TYPE4) is then specified at the boundary between the two domains.
These domains will be created using a pre-processor (using HyperCrash in this tutorial) and the options specific to Multi-Domain analysis will be added to the input decks through a text-editor. A Multi-Domain master input file will also be created using a text editor.
For a list of Multi-Domain options, refer to Multi-Domain Input.
For information on how to create links or connections between domains, refer to Multi-Domain in the User's Guide.
For more information on Multi-Domain Master Input, refer to Multi-Domain Master Input File.
Exercise
Step 1: Import Full Model
| 2. | Set User profile: to RADIOSS V14 and Unit system: to kN mm ms kg. |
| 4. | Click File > Import > RADIOSS to import the model monodomain_0000.rad. |
Step 2: Create Input Files for the Two Domains
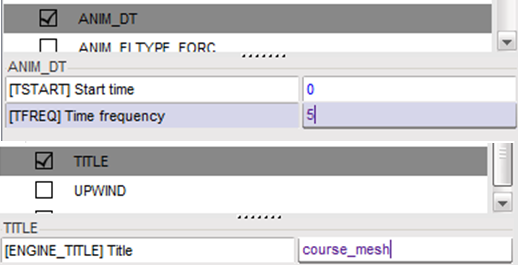
| 1. | Click Model > Control Card to set the Control Cards, as shown in the following images: |
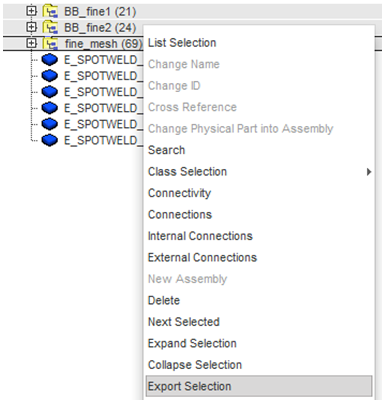
| 2. | In the Tree, select the subsets of the fine-meshed region (subsets BB_fine1 (21), BB_fine2 (24), and fine_mesh (69)), then right-click, then click Export Selection. |
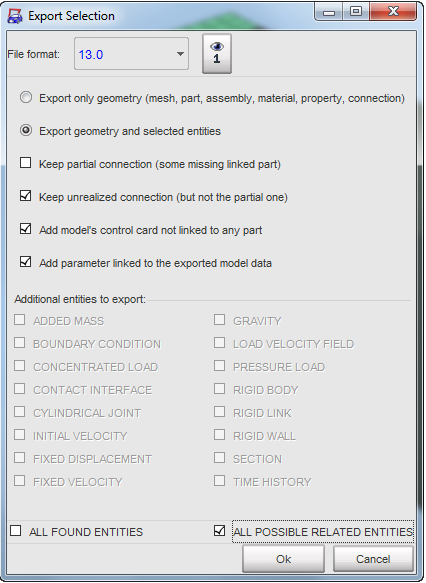
| 2. | In the Export Selection window, select the option to Add model’s control card not linked to any part, toggle Export geometry and select ALL POSSIBLE RELATED ENTITIES. |
| 4. | Save the file as fine_mesh. This will write the file fine_mesh_0000.rad. |
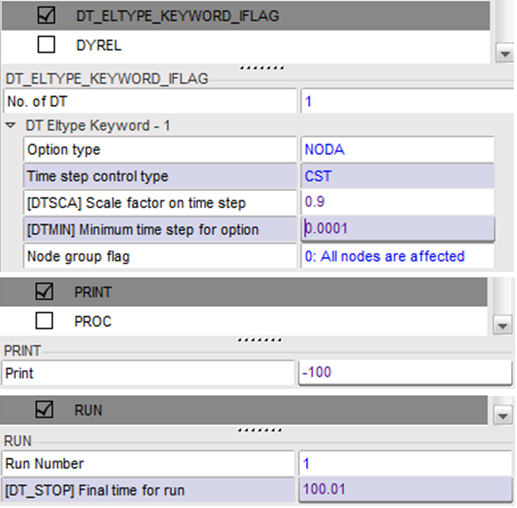
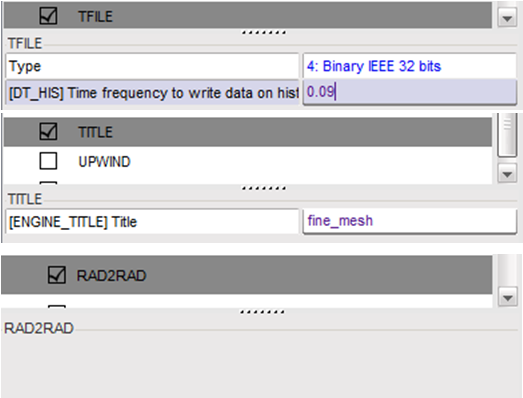
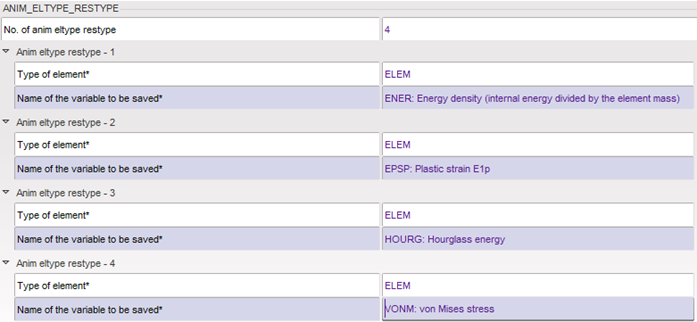
| 5. | Click Model > Control Card and enter the following Control Cards: |
| 6. | In the Tree, select the subsets/spotwelds of the coarse-meshed region, then right-click Export Selection. |
| 7. | In the Export Selection window, select the option to Add model’s control card not linked to any part, toggle Export geometry and select ALL POSSIBLE RELATED ENTITIES. |

| 9. | Save the file as coarse_mesh. This will write the file coarse_mesh_0000.rad. |
Step 3: Define Link between the Two Domains
| 1. | In the original single model, the fine meshed region is connected to the coarse meshed region at both ends. When this model is split into two domains, we have to create a set of nodes in both the domains and link these node sets through the starter option (/EXTERN/LINK). This option has to be added to the two Starter input files using a text editor. |
| 2. | Open the Starter file coarse_mesh_0000.rad and add the option /EXTERN/LINK, as shown below: |
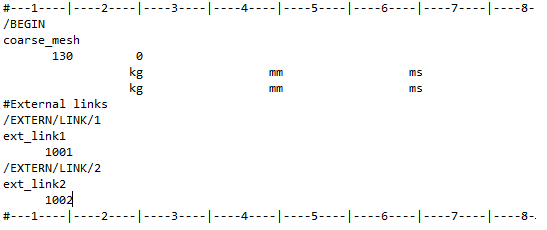
| Note: | Two external links through node sets 1001 and 1002 have been added to this domain. These node sets were already defined in monodomain_0000.rad and exported to the two domains in Step 2. |
|
| 3. | Open the Starter file fine_mesh_0000.rad and add the same options. |
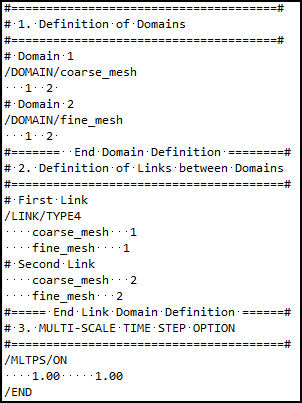
| 4. | Create a RAD2RAD input file input.dat defining the two domains and specifying the connections between them. |
| 5. | The input files are now ready to be run using the Multi-Domain technique. For information on how to launch a Multi-Domain computation, refer to Multi-Domain. |
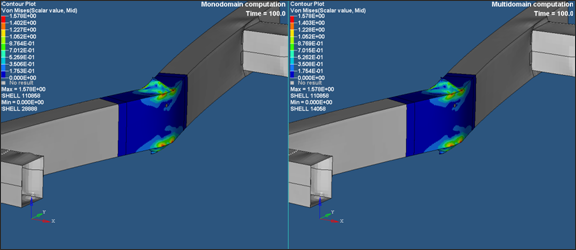
Exercise Expected Results
See Also:
RADIOSS Tutorials
HyperCrash User's Guide


