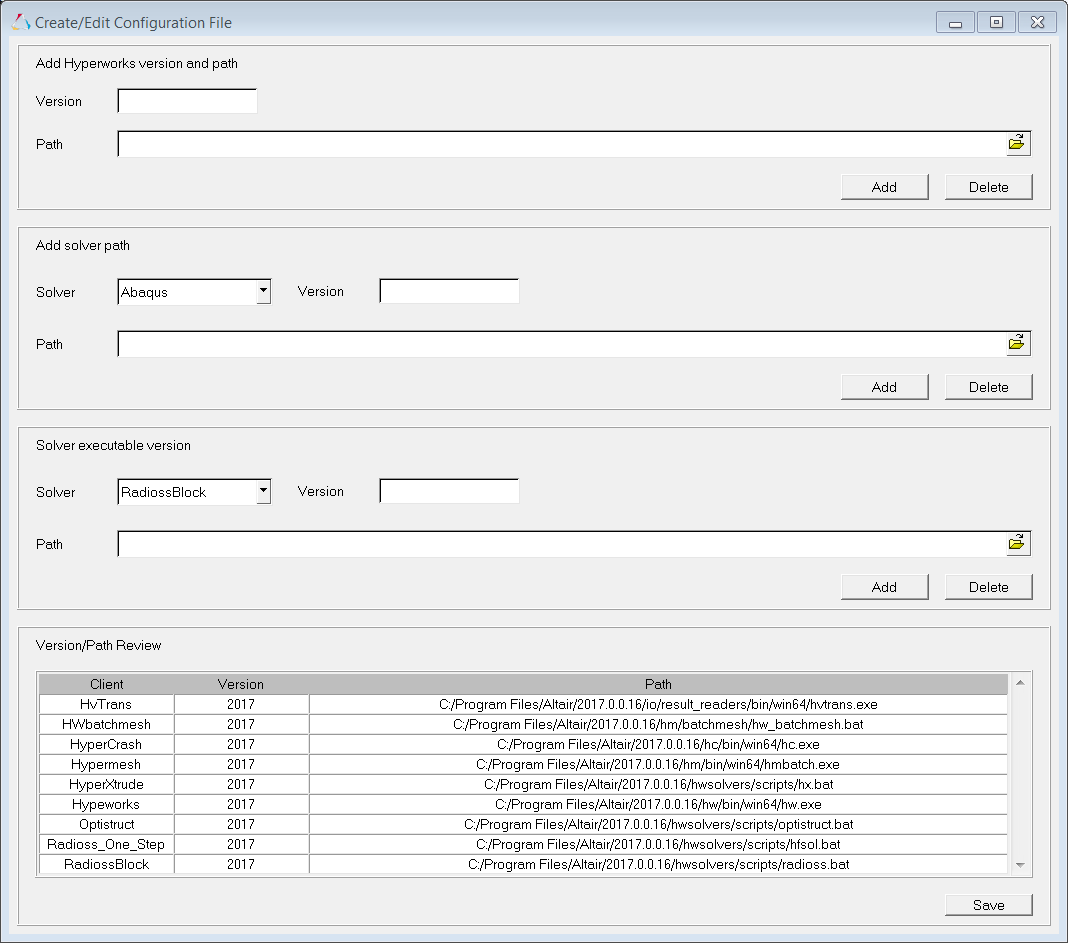
From the Edit menu, select the Config File or Text Editor options.
Use the Config File option to create or edit the configuration file.
Add HyperWorks version and path
| • | Invoke HVVH by invoking the batch file and then clicking Edit menu > Config File. |
| • | In the Version field, enter the HyperWorks version. |
| • | In the Path field, click the file browser icon to select the corresponding HyperWorks executable path. |
| • | Click Add to populate the necessary clients in the Version/Path Review table. |
| • | Click Delete to delete all current entries. |
| • | Click Save to save the configuration file. You must restart HVVH for the new settings to take effect. |
For example:
Version: 2017
Path: C:\altair\2017
For the solver: The actual solver path (based on the solver installation).
Add solver path
| • | From the Solver drop-down menu, select LsDyna or Ansys. |
| • | In the Path field, click the file browser icon to select the solver file path. |
| • | Click Add to populate the necessary clients in the Version/Path Review table. |
| • | Click Delete to delete all current entries. |
Solver executable version
| • | From the Solver drop-down menu, select RadiossBlock or OptiStruct. |
| • | In the Version field, enter the HyperWorks version. |
| • | In the Path field, click the file browser icon to select the solver executable directory. |
| • | Click Add to populate the necessary clients in the Version/Path Review table. |
| • | Click Delete to delete all current entries. |

Create/Edit Configuration File dialog
|
Use the Text Editor option to set the location of the text editor (the editor that you want to use for viewing reports) on your PC. Click the file browser icon to set the location.

Set text editor dialog
|


