The Extrusion Wizard is used to create data decks for metal extrusion analysis starting from a CAD file. There are two ways to use this Extrusion Wizard:
| • | Start with a clean set of solids representing the metal extrusion components such as billet, pockets, etc. and complete the creation of the data decks using this tool. |
| • | Start with a completed mesh representing the metal extrusion components such as billet, pockets, etc. and complete the creation of the data decks using this tool. This aspect of the Extrusion Wizard is similar to Metal Extrusion Template. |
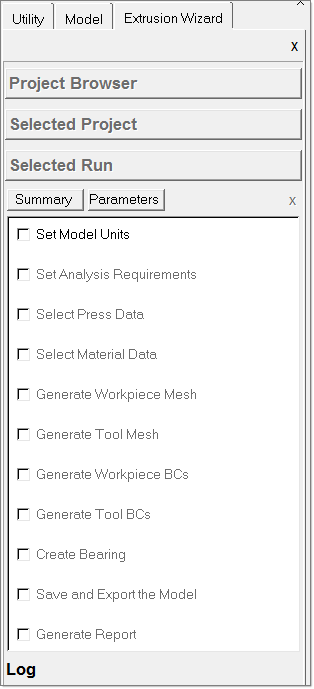
When you click on the Extrusion Wizard macro, it opens a separate tab showing all the steps in the Extrusion Wizard. You must complete each one of these simple steps one at a time for the Extrusion Wizard to run successfully. No knowledge of HyperMesh is necessary to complete the steps.
Extrusion Wizard Tab
Steps used to create the data deck are represented using check boxes. These steps are:
| • | Set the analysis requirements |
| • | Select the material data |
| • | Generate the workpiece mesh or assign mesh components (if mesh already exists) |
| • | Set the process conditions to create the boundary data for Workpiece |
| • | Create bearing from bearing lines |
| • | Save and export the models |
|

|
Creating a new project and loading the model is handled by the Project Browser. Hence, the Create Project Directory step is removed from the Extrusion Wizard. For information on loading a model, see the Project Browser topic, which is common for all wizards of HyperXtrude.
The status of the completed steps is indicated in the status bar below the Project panel. Click Summary to display information regarding process conditions, materials selected, BCs created and element statistics. Click the Close icon to close the Extrusion Wizard tab and return to the selected Run panel.
Information created will be retained even when you close and re-open the tab, or when you close HyperMesh and start it again using the same model file.


