In this tutorial you will learn how to import size and shape variables to HyperStudy from HyperMesh. The input variables are three shape variables; xtrans, ytrans and radius. Each of these shapes are created by perturbing the mesh in the corresponding directions by 1 unit.
The sample base input template used in this tutorial can be found in <hst.zip>/HS-1025/. Copy the tutorial files from this directory to your working directory.
|
|
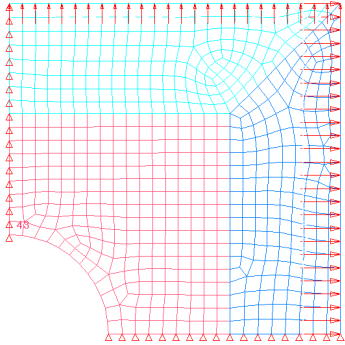
Figure 1: Double Symmetric Plate Model
|
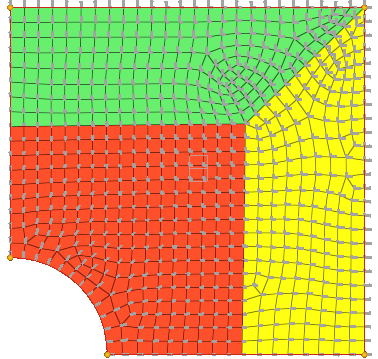
Figure 2: Double Symmetric Plate Model with Shape Vectors
|
| 2. | To start a new study, click File > New from the menu bar, or click  on the toolbar. on the toolbar. |
| 3. | In the HyperStudy – Add dialog, enter a study name, select a location for the study, and click OK. |
| 4. | Go to the Define Models step. |
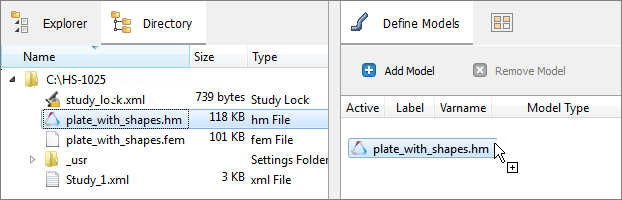
| a. | From the Directory, drag-and-drop the plate_with_shapes.hm into the work area. |
| b. | In the Solver input file column, enter plate.fem. This is the name of the solver input file HyperStudy writes during any evaluation. |
| c. | In the Solver execution script column, select OptiStruct (os). |

| 6. | Click Import Variables. |
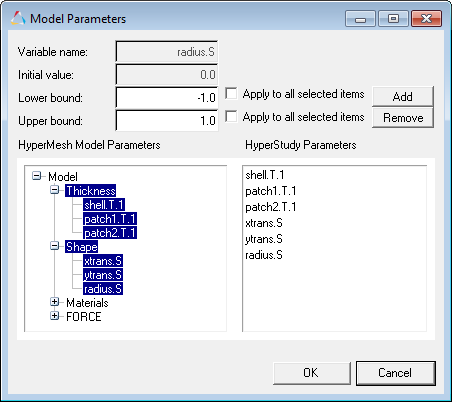
| 7. | In the Model Parameters dialog, select parameters to import into HyperStudy. |
| a. | Select the thickness and shape variables. A total of 6 parameters should be selected. |
| 8. | Go to the Define Input Variables step. |
| 9. | Review the input variable's lower and upper bound ranges. |
| 10. | Go to the Specifications step. |
|
| 1. | In the work area, set the Mode to Nominal Run. |
| 3. | Go to the Evaluate step. |
| 5. | Go to the Define Output Responses step. |
|
In this step you will create two output responses: Mass and Displacement.
| 1. | Create the Mass output response. |
| a. | From the Directory, drag-and-drop the plate.out file, located in approaches/nom_1/run_00001/m_1, into the work area. |
| b. | In the File Assistant dialog, set the Reading technology to Altair® HyperWorks® and click Next. |
| c. | Select Single item in a time series, then click Next. |
| d. | Define the following options, and then click Next. |
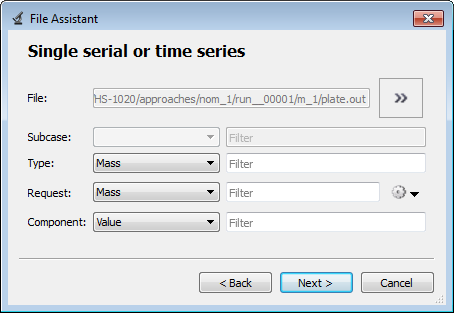
| e. | Label the output response Mass. |
| f. | Set Expression to First Element. |
| Note: | Because there is only a single value in this vector, [0] is inserted after v_1, thereby choosing the first (and only) entry in the vector. |
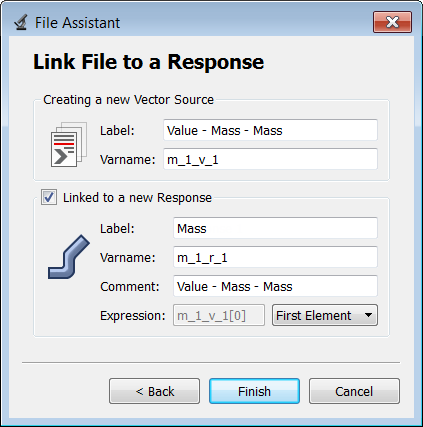
| g. | Click Finish. The Mass output response is added to the work area. |
| 2. | Create the Displacement output response. |
| a. | From the Directory, drag-and-drop the plate.h3d file, located in approaches/nom_1/run_00001/m_1, into the work area. |
| b. | In the File Assistant dialog, set the Reading technology to Altair® HyperWorks® and click Next. |
| c. | Select Single item in a time series, then click Next. |
| d. | Define the following options, and then click Next. |
| • | Set Subcase to Subcase 1 (Load). |
| • | Set Type to Displacement (Grids). |
| e. | Label the output response Displacement. |
| f. | Set Expression to First Element. |
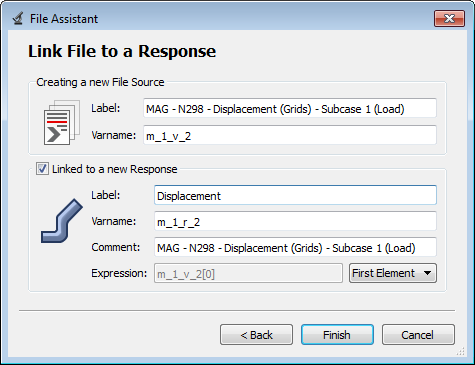
| g. | Click Finish. The Displacement output response is added to the work area. |
| 3. | Click Evaluate to extract the output response values. |

| 4. | Proceed to the desired study type (DOE, Optimization, of Stochastic study). |
|
See Also:
HyperStudy Tutorials


