|
»Click here to display Table of Contents«
|

Events |

|

|

|

|
|
Events |
|
|
|

|
|
»Click here to display Table of Contents«
|
Events |
|
|
|
|
|
Events |
|
|
|
|
Events create motions and forces in the model which make the system move. Most events add additional parts to the model to perform the simulation. Nine standard events can be added to a half-car model using the Analysis > Task Wizard option. User-defined events for special tasks are also permitted and require the use and understanding of both MDL and the MotionSolve XML input deck. The following steps outline how to add a ride event to the previously built model (see Building a Front Suspension and Steering Systems Model).
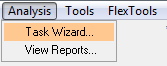
| 1. | From the Analysis menu, select Task Wizard to begin adding an event to the model. |
| 2. | Select Static Ride Analysis for this model. |
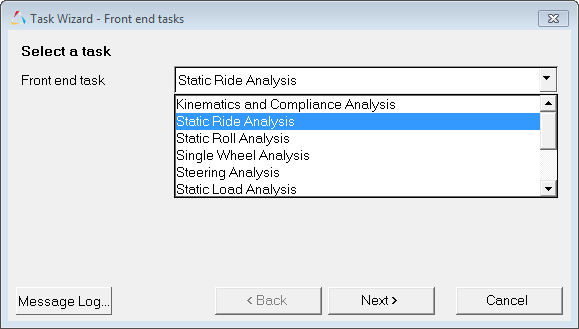
Note Nine different events can be added for a front suspension model.
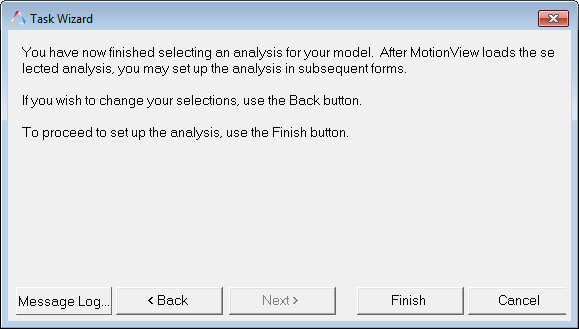
| 3. | Select Finish to complete the Task Wizard. |
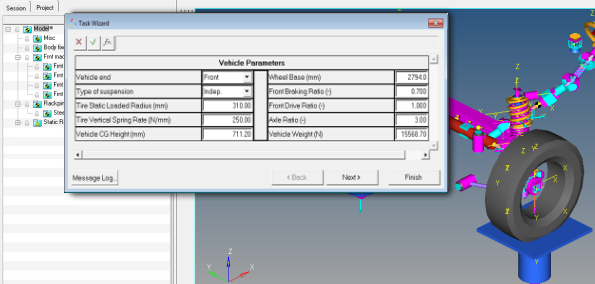
| 4. | Add the requested information for the vehicle. This information is used to calculate the Suspension Design Factors and can be modified later. |
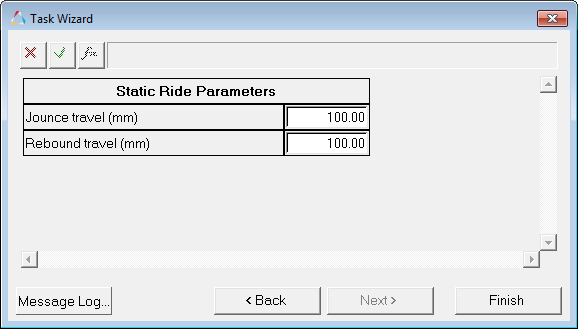
Note that a mechanism is now added to the model to create the ride travel in the suspension.
| 5. | Add the distance that the suspension will travel during the event in jounce and rebound. The steering wheel is held fixed in this event. |
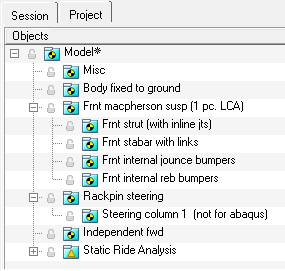
The Static Ride Analysis event appears in the Browser as the final System/Analysis:
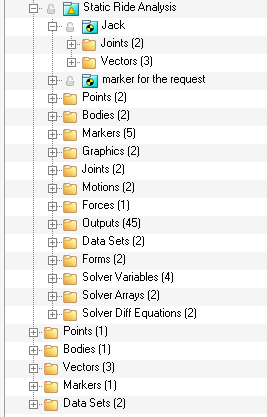
The Static Ride Analysis event has a variety of MotionView modeling elements in it to create the ride event:
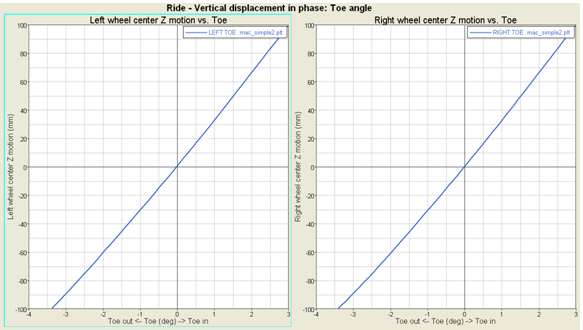
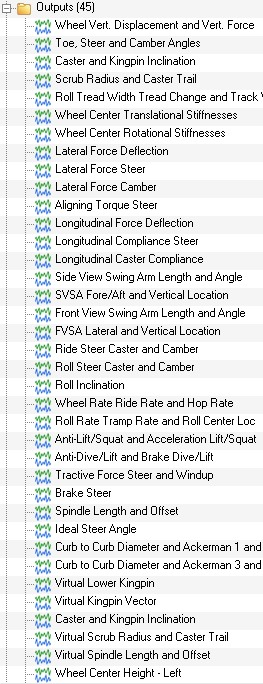
Suspension Design Factors are created by the event. These factors are used to evaluate the performance of the suspension. They are automatically created to match the topology of the suspension being analyzed:
The event is now ready to run.
| 1. | From the Model-Main toolbar, click the Run icon |

| 2. | Enter an output file name to run the model (in the field located next to the Save and run current model option). |
| 3. | Click the Run button (located on the far right side of the panel). |
| 3. | The solver displays several windows as it runs. Close the windows and return to the MotionView interface. |
At this point, you can plot results, look at an animation, or examine tabular results.
| 4. | Select either the Animate or Plot button (located on the far right side of the panel). Both buttons should now be active. |

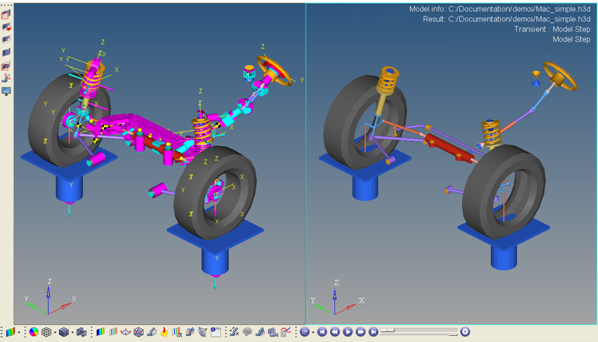
Animate opens another window and creates an animation of the simulation results. Always examine the animation to verify the results are reasonable. The animation window should be used to understand the model results. The following uses are recommended:
| • | Add force requests and animate the forces in the model. |
| • | Add CAD geometry and identify clearance issues. |
| • | Zoom, rotate, and pan in the model to understand the model displacements. |
Selecting Animate will add a second window (on the right).
Suspension Design Factors can be plotted using HyperGraph. The data is available in either the .req or the .abf file written from MotionSolve. A sample plot is shown below: