| 1. | From the HyperMorph module, select the Morph panel. |
| 3. | Change the upper middle selector to interactive. |
| 4. | Change the rightmost toggle from real time to on release. |
| 5. | Change the lower middle selector from on domains to along vector. |
| 8. | Select a handle on the screen and hold the mouse button down. |
| 9. | Move the handle to the new location and release the mouse button. |
As you drag the mouse, the handle follows along the selected vector. Since on release was selected, only the graphics for the handle are updated, which leaves a dark trail through the mesh. When you release the mouse button, the morph is applied to the model and the graphics are updated for the entire model. If the handle position needs to be changed again, repeat steps 7 through 9.
| 10. | Move more than one handle at the same time: |
| • | Before clicking morph, select several handles on the screen. |
| • | Perform steps 7 through 9. |
When you release the mouse, all of the selected handles are moved the same distance in the same direction.
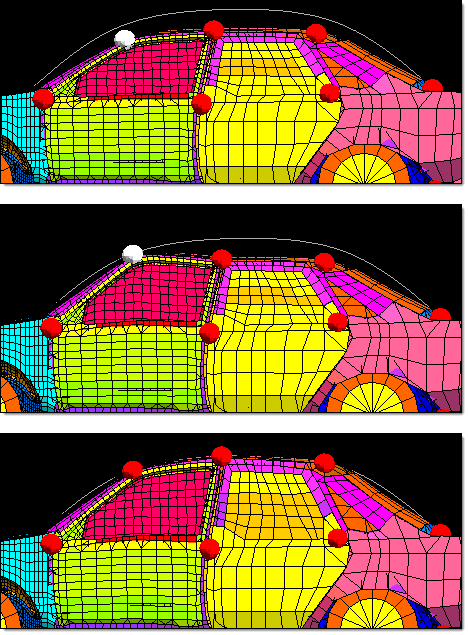
Morphing to a profile line
In the top frame, the global handles on either side of top of the windshield are selected.
In the middle frame they are interactively moved upwards along a vector to a point
matching with the profile line. In the bottom frame the process has been repeated
for the other handles on the roof. The result is a morphed vehicle model that closely
matches the profile line.
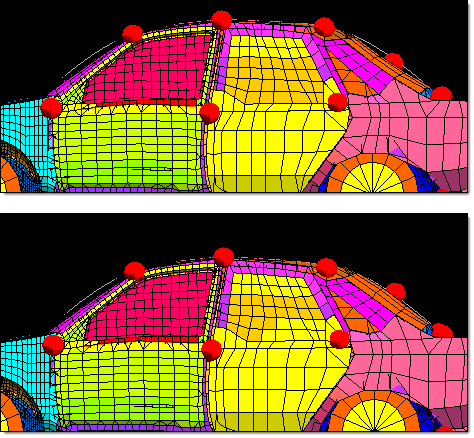
Morphing to a profile line
A handle is added to the center of the rear windshield and is moved to better match
the profile line. Handles may always be added or deleted from a model without
affecting the current morphed state of the model. However, any shapes saved as
handle perturbations may not yield the same morphed shape after handles have
been added or deleted. If you intend to add or delete handles in your model, save
your shapes as node perturbations. HyperMorph will give you the option of
converting existing shapes from handle perturbations to node perturbations
automatically after you add, edit, or delete any morphing entities.
You can also select other features to drag the handle along such as a line, a plane, or a surface. HyperMorph uses the position of the mouse on the screen to figure out where you want to move the handle. You can use this feature to position a handle anywhere you want line or surface data.
|


