Element Based Surface: Adjust Normal Tab |

|

|

|

|
|
Element Based Surface: Adjust Normal Tab |

|

|

|

|
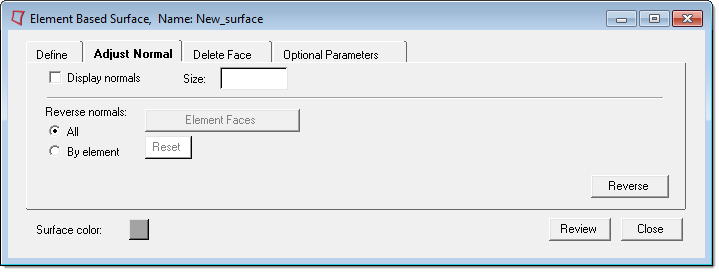
In the Adjust Normal tab, you can display and reverse normal direction for surfaces defined on 3D shell, membrane, rigid and 2D beam, pipe, and truss elements. For these elements, the normal directions are used to define the SPOS or SNEG face identifiers. In HyperMesh, surfaces can be displayed in two ways: by special face elements or by contactsurfaces. The surfaces defined on 3D shell, membrane, rigid elements are displayed by face elements while surfaces on 2D beam, pipe, and truss elements are displayed by contactsurfaces. The normal directions of the contactsurfaces are part of their display. However, the normal directions of the faces have to be turned on for displaying. Use the Display normals checkbox to display the normals of the faces. Use the Size: entry box to define the size of the normals before selecting the Display normals checkbox.
|

There are two options for reversing normals: (a) Reverse all normals at a time, (b) Reverse normals by individual faces or contactsurfaces.
(a) Reverse normals: All enables the following:
Button |
Action |
||
Reverse |
Reverses normals of all faces for 3D shell, membrane, rigid elements and all contactsurfaces for 2D beam, pipe, truss elements in the current surface.
|
(b) Reverse normals: By element enables the following:
Button |
Action |
||
Element faces |
Opens the Element Selector panel. For 3D shell, membrane, rigid elements, pick the faces (not the underlying elements). However, for 2D beam, pipe, truss elements, pick the elements themselves as the contactsurfaces can not be picked from the graphic area. The corresponding Reset button resets the selected elements. |
||
Reverse |
Reverses normals of the selected faces for 3D shell, membrane, rigid elements and contactsurfaces of the selected 2D beam, pipe, truss elements.
|
See Also:
Element Based Surface: Define Tab