|
»Click here to display Table of Contents«
|

HM-3520: Sculpting |

|

|

|

|
|
HM-3520: Sculpting |
|
|
|

|
|
»Click here to display Table of Contents«
|
HM-3520: Sculpting |
|
|
|
|
|
HM-3520: Sculpting |
|
|
|
|
This exercise uses the dummy_position_solid.hm file, which can be found in the hm.zip file. Copy the file(s) from this directory to your working directory.
The objective of this exercise is to take a dummy pelvis profile and imprint it onto a seat.
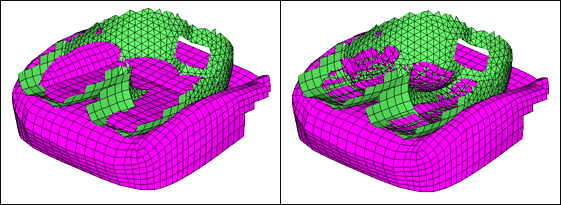
Figure 1: Seat before and after sculpting
Step 1: Load and review the model.
Open the HyperMesh file, dummy_position_solid.hm.
Step 2: Morph the seat.
| 1. | From the menu bar, click Morphing > Free Hand. |
| 2. | Go to the sculpting subpanel. |
| 3. | Set the sculpting tool to mesh. |
| 4. | For the sculpting tool, select all of the elements in the dummy collector (Figure 2). |
| 5. | For affected elements, select all of the elements in the seat collector (Figure 2). |
| 6. | For the base point as well as the tool path: node list, choose a node on the dummy (Figure 2). |
| 7. | Define a sculpt direction for your seat using N1 N2 (Figure 2). |
| 8. | Set your taper angle to 85 (degrees). |
| 9. | Verify that mesh compression is set to compress by factor. |
| 10. | Set mesh compr= to 0.5. |
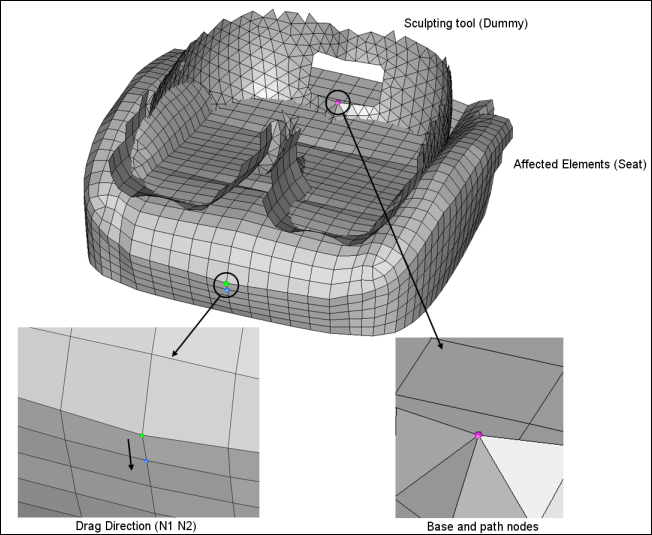
Figure 2: Setting up the model for morphing
| 10. | Click move+ to complete the morphing operation. |
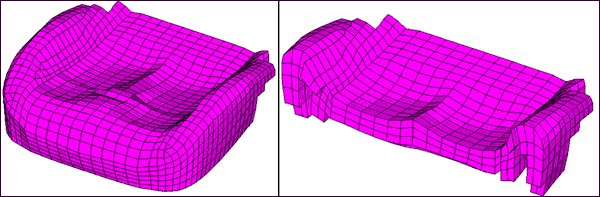
Figure 3: Seat after sculpting
| 11. | Review the obtained mesh quality. |
Using just a few steps you have been able to take a fairly complicated profile and impose it on to another mesh.