Model Files
This exercise uses the body_side.hm file, which can be found in the hm.zip file. Copy the file(s) from this directory to your working directory.
Exercise: Changing the Shape of the B-pillar with the Help of Morph Volume
This exercise shows how to smoothly change the shape of a B-pillar via morph volumes.

B-Pillar before and after morphing
Step 1: Load and review the model.
| 1. | Start HyperMesh Desktop. |
| 2. | To open a model file, click File > Open > Model from the menu bar, or click  on the Standard toolbar. on the Standard toolbar. |
| 3. | In the Open Model dialog, open the body_side.hm file. A model appears in the graphics area. |
Step 2: Create morph volumes.
| 1. | To open the Morph Volumes panel, click Morphing > Create > Morph Volumes from the menu bar. |
| 2. | Set the creation method to pick on screen. |
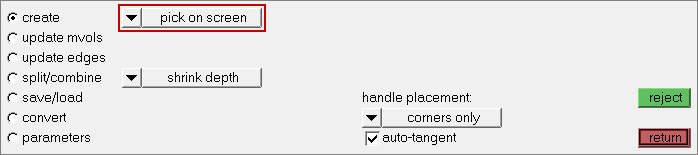
| 3. | Set handle placement to corners only. |
| 4. | Select the auto-tangent check box. |
| 5. | On the Standard Views toolbar, click  . . |
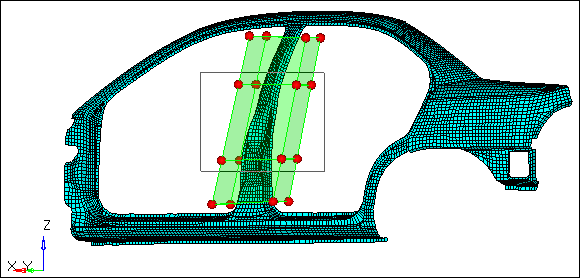
| 6. | Click the four red circles indicated in the image below to draw a window. HyperMesh creates a morph volume, which encloses the area. |
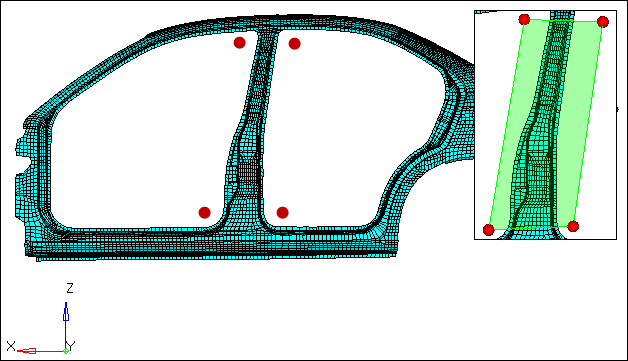
Points for creating the morph volume
Step 3: Split the morph volumes.
| 1. | Go to the split/combine subpanel. |
| 2. | Set the by nodes/by edge toggle to by edges |
| 3. | Select an edge of the morph volume close to location 1 as indicated in the following image. A green colored cross moves to the location of the black dot. |
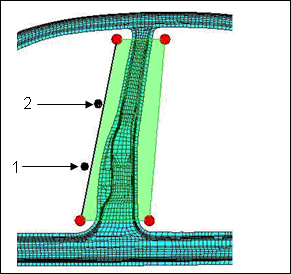
Locations to split the morph volume
| 4. | Click split. HyperMesh splits the morph volume into two. |
| 5. | Repeat steps 3.3 and 3.4, except select an edge of the morph volume close to location 2 as indicated in the previous image. |
Step 4: Change the profile of the b-pillar.
Method 1: Fixed value based
| 1. | To open the Morph panel, click Morphing > Morph from the menu bar. |
| 2. | Go to the move handles subpanel. |
| 3. | Set the morphing method to translate. |
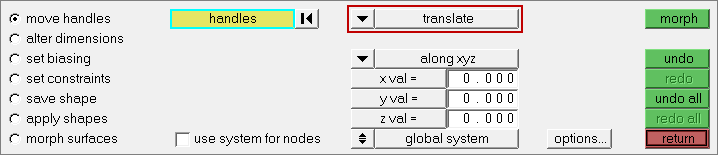
| 4. | Set the orientation selector to along xyz. |
| 5. | In the y val= field, enter 100. |
| 6. | Leave the x val= and z val= fields set to 0. |
| 7. | Press and hold SHIFT, then drag your mouse around the the eight handles indicated in the image below. |
Select handles for morphing
| 9. | To verify that the b-pillar is morphed, rotate the model. |

| 10. | To restore the model's original shape, click undo. |
Method 2: Interactive graphic manipulator base
| 11. | In the move nodes subpanel, set the morphing method to interactive and manipulators. |
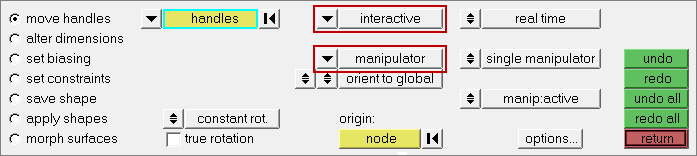
| 12. | Leave the other parameters and options set to their default values. |
| 13. | On the Standard Views toolbar, click . |
| 14. | Press and hold SHIFT, then drag your mouse around the the eight handles indicated in the image below. A manipulator appears. |
| 15. | Optional: You can select another node as the origin to set the manipulator in a different position. |
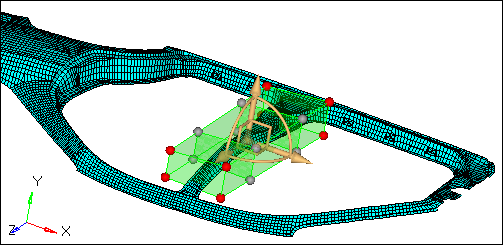
| 16. | Zoom in and rotate close to the manipulator area. |
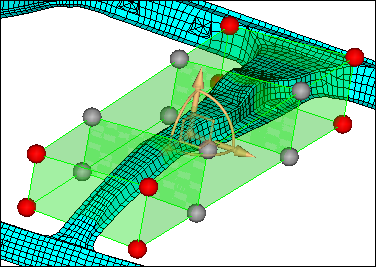
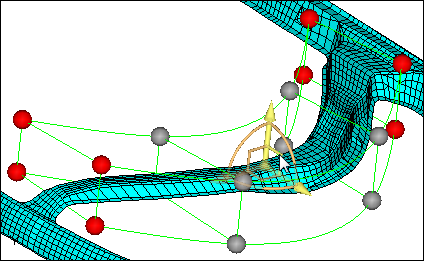
| 17. | To translate the nodes, click and drag, graphically, one of the three yellow arrows of the manipulator. |
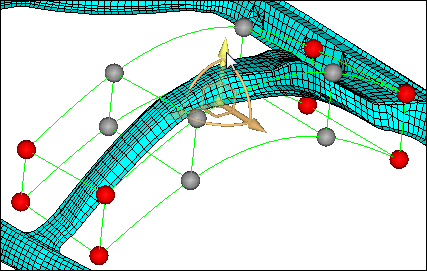
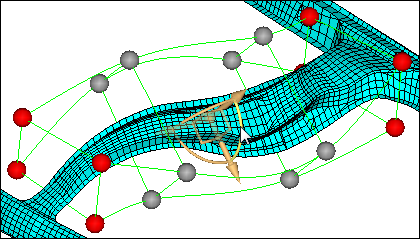
| 19. | To rotate the nodes about the center of the manipulator, click and drag, graphically, one of the three yellow arcs of the manipulator. |
| 21. | To move the nodes in a plane, click and drag, graphically, one of the three yellow right angles of the manipulator. |
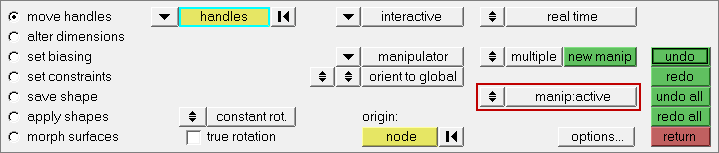
| 23. | To create more than one manipulator at a time, set the single manipulator/multiple toggle to multiple. |

| 24. | To create a new manipulator, click new manip and then graphically select one or more moving nodes. |
| Note: | The different manipulators may have different selected entities and different parameters, and can be moved independently of one another. |
| 25. | To move a manipulator, click a manipulator or simply move your mouse over a manipulator. HyperMesh updates the panel to the parameters associated to that manipulator. You can change the parameters or the entities associated with them if you desire. |
| 26. | To make manipulators active or inactive, switch the manip:active/manip:inactive toggle. When active, the manipulators morph the model when you move them. When inactive, the manipulators will only change their own position and orientation when you move them. |
Summary
In both methods, you morphed the b-pillar in a smooth fashion with minimum distortion to the elements.
See Also:
HyperMesh Tutorials


