Model Files
This exercise uses the spring.hm file, which can be found in the hm.zip file. Copy the file(s) from this directory to your working directory.
Exercise: Changing the Radius of the Spring Coil
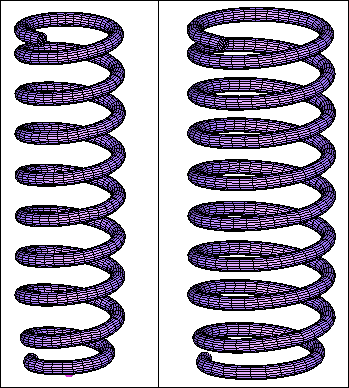
In this exercise, you will increase the radius of the spring coil.

Figure 1: Before and after morphing
Step 1: Load and review the model.
Open the HyperMesh file, spring.hm.
Step 2: Change the coil radius.
| 1. | Click the Morphing menu and pick Create > Domains. |
| 2. | Switch domain type to 2D domains. |
| 3. | Verify that the elements toggle is set to all elements. |
| 4. | Verify that only the partition 2D domains option is active. |
| 6. | Click the Morphing menu and pick Morph. Enter the alter dimensions subpanel if not already there. |
| 7. | Change the morphing method to radius. |
| 8. | Change the center calculation to by axis. |
| 9. | Change the axis to the z-axis. |

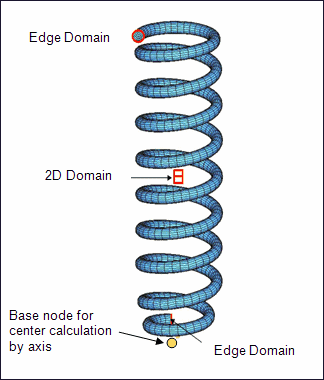
Figure 2: Domains and base node to select for altering the coil radius
| 10. | For domains (under edge and 2D) select the 2-D domain and the two edge domains. |
| 11. | For the base node for the z-axis select the node as shown in Figure 2. |
| 12. | Keep the default settings for the remaining options. |
| 13. | Activate add to current. |
| 14. | In the radius field, type 20. |
Summary
Twenty units are added to the coil radius.
See Also:
HyperMesh Tutorials


