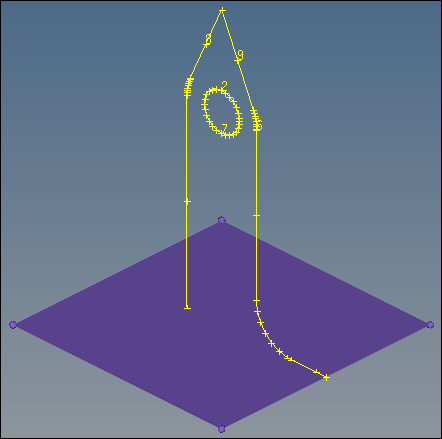
In this tutorial, you will learn how to:
| • | Create circle, arc, line, and tangent lines |
| • | Duplicate and translate lines |
| • | Edit lines by splitting and displaying their IDs |
| • | Delete redundant arcs and lines |
| • | Duplicate and reflect an arc |
| • | Create a surface square and two parallel lines on an X-Y plane |
| • | Create a fillet between two lines |
| • | Exporting geometry in IGES format |
Sometimes CAE users need to create models from sketches where there is no pre-existing geometry. The tools in this tutorial will help you accomplish that task.
Exercise: Creating and Editing Line Data
In this exercise, you will learn how to create lines and surfaces.
Step 1: Create a component collector to geometry.
| 1. | To create a component, right-click in the Model browser and select Create > Component from the context menu, or click Collectors > Create > Components from the menu bar. |
| 2. | In the Create Component dialog, enter geometry in the Name field. |
| 3. | Click the Color swatch and select yellow from the box of colors. |
Step 2: Create nodes.
| 1. | On the standard toolbar, click  . . |
| 2. | To open the Create Nodes panel in the XYZ subpanel, click Geometry > Create > Nodes > XYZ from the menu bar.5 |
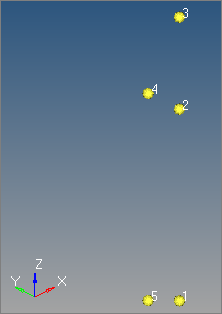
| 3. | Enter the following X, Y, and Z coordinates listed in the table below to create five nodes. Click create for each of the nodes. |
Node
|
X
|
Y
|
Z
|
1
|
0
|
0
|
0
|
2
|
0
|
0
|
25
|
3
|
0
|
0
|
37
|
4
|
0
|
5
|
25
|
5
|
0
|
5
|
-2
|
| 5. | To fit the size of the model to the graphics area, press f. |
Step 3: Display the node IDs.
| 1. | To open the Numbers panel, click  on the Display toolbar. on the Display toolbar. |
| 2. | Verify that the entity selector is set to nodes. |
| 3. | To select all of the nodes in the model, click nodes >> all. |
| 4. | Select the display check box. |
| 5. | Click on. HyperMesh displays the node IDs. |

Step 4: Create a circle.
| 1. | To open the Circle Center and Radius panel, click Geometry > Create > Lines > Circle Center and Radius from the menu bar. |
| 2. | Verify that the node list selector is active. |
| 3. | Select Node 2. This will be the location of the circle’s center. |
| 4. | Set the orientation vector to x-axis. |
| 5. | In the radius field, enter 5. |
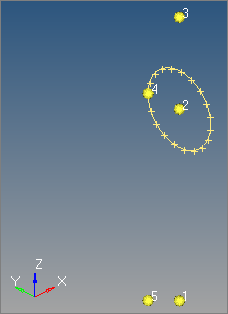
| 6. | Click create. HyperMesh creates the circles's center. |

Step 5: Create an arc.
| 1. | To open the Arc Center and Radius subpanel, click  . . |
| 2. | Verify that the node list entity selector is active. |
| 3. | Select node 2. This node will be the center of the arc as well as the base for the axis of rotation. |
| 4. | Verify that the orientation vector is set to x-axis. |
| 5. | In the Radius field, enter 2.5. |
| 6. | In the Offset field, enter 90. |
| 7. | In the Angle field, enter 180. |
| 8. | Click create. HyperMesh creates an arc. |
| 9. | On the Standard toolbar, click  . . |

Step 6: Create a line.
| 1. | To open the Linear Nodes subpanel, click  . . |
| 2. | Select Node 4 and Node 5. |
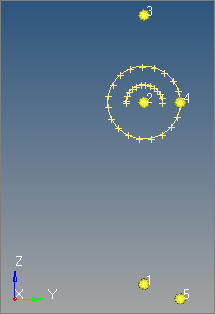
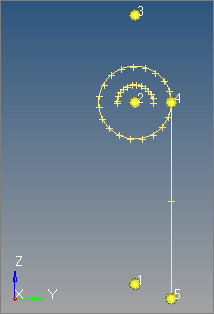
| 3. | Click create. HyperMesh creates a line between nodes 4 and 5. |

Step 7: Duplicate and translate lines.
| 1. | To open the Translate panel, click Geometry > Translate > Lines from the menu bar. |
| 2. | Verify that the entity selector is set to lines. |
| 3. | Select the line that was created between nodes 4 and 5. |
| 4. | Click lines >> duplicate >> current comp. Hypermesh copies the new line into the current component, Geometry. |
| 5. | Set the orientation vector to y-axis. |
| 6. | In the magnitude = field, enter 10.0. |

Step 8: Edit lines by splitting at a line.
| 1. | To open the Line Edit panel, click Geometry > Edit > Lines > Split at Line from the menu bar. |
| 2. | Verify that the lines selector is active. |
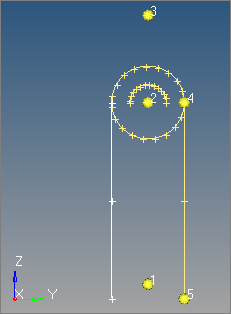
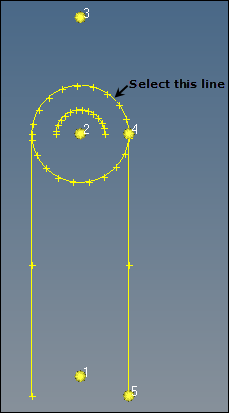
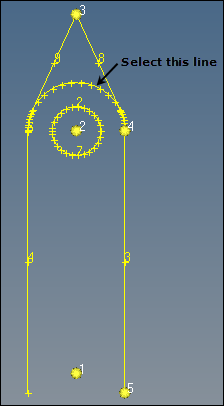
| 3. | Select the top, right curved line of the circle indicated in the following image. |

| 5. | Select the line between nodes 4 and 5. |
| 6. | Click split. The circle has one quarter of it's radius split off from the rest. |
| 7. | Repeat steps 8.2 through 8.6 to select the top, left curved line of the circle and the other line that was translated in step 7. |
Step 9: Display the line IDs.
| 1. | Go to the Numbers panel. |
| 2. | Set the entity selector to lines. |
| 3. | Click lines >> all. HyperMesh selects all of the lines in the model. |
| 4. | Verify that the display check box is selected. |
| 5. | To display all of the line IDs, click on. |
Step 10: Delete a redundant arc.
| 1. | To open the Delete panel, click  on the Collectors toolbar, or press F2. on the Collectors toolbar, or press F2. |
| 2. | Set the entity selector to lines. |
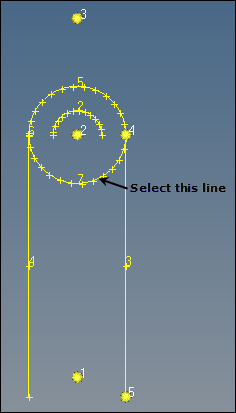
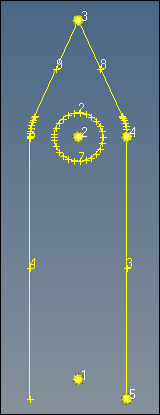
| 3. | Select the bottom right curved line of the circle indicated in the following image. |

| 4. | Click delete entity. HyperMesh deletes the redundant arc. |
| 5. | Select the bottom left curve and then click delete entity. |
Step 11: Duplicate and reflect an arc.
| 1. | To open the Reflect panel, click Geometry > Reflect > Lines from the menu bar. |
| 2. | Set the entity selector to lines. |
| 3. | Select the arc (line ID 2). |
| 4. | Set the orientation vector to z-axis. |
| 5. | Select Node 2 as the base node. |
| 6. | Click lines >> duplicate >> original comp to copy the new line into the current component, Geometry. |
| 7. | Click reflect. HyperMesh creates the lower arc. |

Step 12: Create two tangent lines.
| 1. | To go to the Tangents panel, click Geometry > Create > Lines > Tangent from the menu bar. |
| 2. | Set the entity selector to node list. |
| 4. | Activate the line selector. |
| 5. | Select the semi-circular line (line ID 5). |
| Note: | Your line IDs may be different, depending on whether you needed to perform the split/delete/duplicate tasks more than once. |
| 6. | Click create. HyperMesh creates two tangent lines. |
| 7. | Select one of the tangent lines. |
| 8. | Repeat steps 12.3 through 12.7. |
| 9. | Select the other tangent line. |
| 10. | To exit the panel, click return. |

Step 13: Redisplay the line IDs.
| 1. | Go to the Numbers panel. |
| 2. | Set the entity selector to lines. |
| 4. | Verify that the display check box is selected. |
| 5. | Click on. HyperMesh displays all of the line IDs. |
| 6. | To exit the panel, click return. |
Step 14: Split curves by tangent line and delete redundant line.
| 1. | Go to the Split at Line subpanel. |
| 2. | Verify that the lines selector is active. |
| 3. | Select the semi-circular line (ID 5). |
| Note: | The line IDs may be different. |
| 5. | Select the left tangent line (ID 9). |
| 6. | Click split. HyperMesh splits the semi-circular line (ID 5) with the selected tangent line (ID 9). |
| 7. | Repeat steps 14.2 through 14.6 to cut the semi-circular line (ID 5) with the right tangent line (ID 8). |
| 8. | Go to the Delete panel. |
| 9. | Verify that entity selector is active and set to lines. |
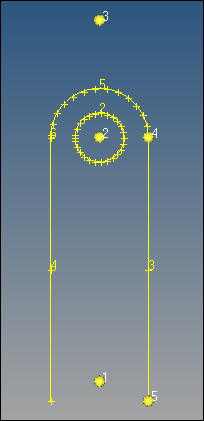
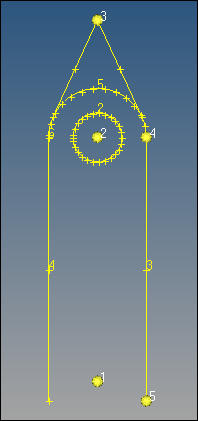
| 10. | Select the semi-circular line between the two tangent lines indicated in the following image. |

| 11. | Click delete entity. HyperMesh deletes the semi-circular line. |
| 12. | To exit the panels, click return twice. |

Step 15: Create a component collector for surfaces.
| 1. | In the Model browser, right-click and select Create > Component from the context menu. |
| 2. | In the Create component dialog, enter surfaces in the Name field. |
| 3. | Click the Color icon, and select purple. |
Step 16: Create a surface square on an X-Y plane.
| 1. | From the main menu, go to the 2D page and select Planes. |
| 2. | Go to the Square subpanel. |
| 3. | Set the orientation vector to z-axis. |
| 4. | Select Node 1 as the base reference node. |
| 5. | Switch mesh, keep surf to surface only. |
| 6. | In the size= field, enter 30. |
| 7. | Click create. HyperMesh creates a square surface. |
| 8. | To exit the panel, click return. |

Step 17: Create a line that connects two parallel lines on an X-Y plane.
| 1. | To open the Intersect panel, click Geometry > Create > Lines > Intersect. |
| 2. | To create a line on the X-Y plane, set the orientation vector to z-axis. |
| 3. | Select Node 1 as the base node. |
| 4. | Activate the line list selector. |
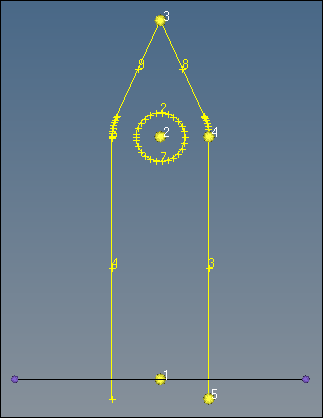
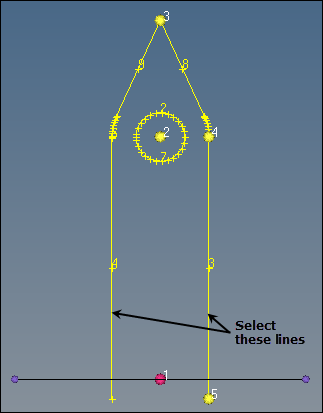
| 5. | Select the two straight lines that are perpendicular to the X-Y plane indicated in the following image. HyperMesh displays a bold, white line in the graphics area to represent the results. |

| 6. | Click create. HyperMesh creates the line. |
| 7. | To exit the panel, click return. |
Step 18: Switch the current working component surfaces to geometry.
| 1. | In the Model browser, Component folder, right-click on geometry and select Make Current from the context menu. |
| Note: | From this point on, when you create any new elements or geometry, HyperMesh will place them in the geometry component collector. |
Step 19: Extend a line to a surface edge.
| 1. | On the Standard Views toolbar, click  . . |
| 2. | To open the Extend panel, click Geometry > Edit > Lines > Extend from the menu bar. |
| 3. | Toggle from distance = to to:. |
| 4. | Set the entity selector to line. |
| 5. | Activate the top line selector. |
| 6. | Select the line that you created in step 17 (the line that passes through Node 1) as the line to be extended. HyperMesh places a red V at the beginning of the line to be extended. |
| 7. | Activate the lower line selector. |
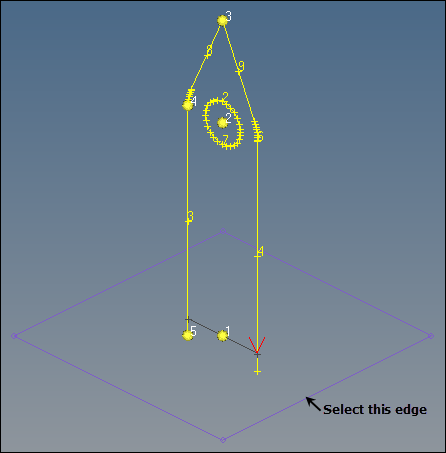
| 8. | Select the lower-right edge of the purple plane indicated in the following image. |

| 9. | Click extend-. HyperMesh extends the line to reach one surface edge. |
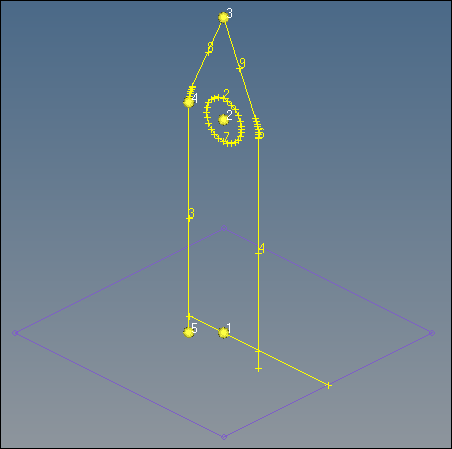
| 10. | To exit the panel, click return. Your model should resemble the following image. |

Step 20: Create a fillet between two lines.
| 1. | To open the Fillet subpanel, click Geometry > Create > Lines > Fillet from the menu bar. |
| 2. | Select the Trim original lines check box. |
| 3. | In the Radius= field, enter 5. |
| 4. | Activate the 1st line selector. |
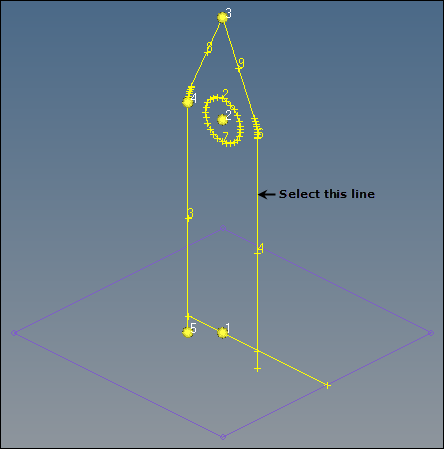
| 5. | Select the vertical line through which the extended line passes indicated in the following image. |

| 6. | Activate the 2nd line selector. |
| 7. | Select the extended line that you created in step 19. The status bar reads, "Please select fillet quadrant", which indicates that HyperMesh wants you to select a reference location for the fillet. |
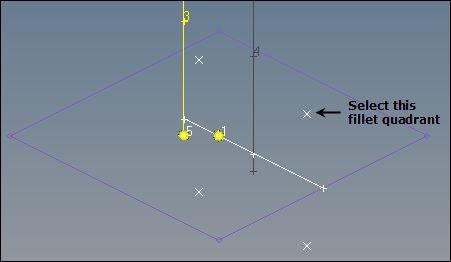
| 8. | Select the top, right X for the fillet quadrant indicated in the following image. HyperMesh creates a fillet. |

| 9. | To return to the Lines panel, click return. |

Step 21: Trim a line by plane and delete a redundant line segment.
| 1. | To open the Split at Plane panel, click Geometry > Edit > Lines > Split at Plane from the menu bar. |
| 2. | Verify that the lines selector is active. |
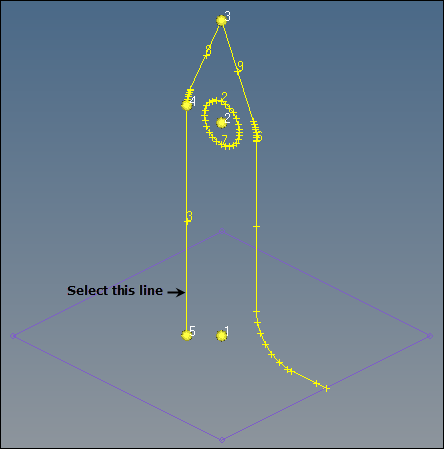
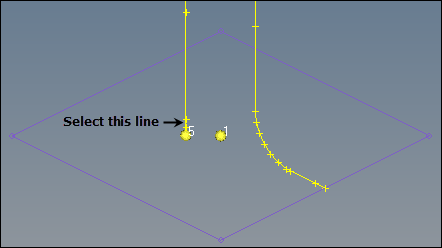
| 3. | Select the vertical line that does not have a fillet indicated in the following image. |

| 4. | Set the orientation vector to z-axis. |
| 5. | Select Node 1 as the base node. |
| 6. | Click split. HyperMesh splits the line by the X-Y plane. |
| 7. | Go to the Delete panel. |
| 8. | Set the entity selector to lines. |
| 9. | Select the small line segment under the X-Y plane. |

| 10. | Click delete entity. HyperMesh removes the line segment. |
| 11. | To exit the panels, click return twice. |
Step 22: Remove all temp nodes.
| 1. | To go to the Temp Nodes panel, click Mesh > Delete > Nodes from the menu bar, or press Shift + F2. |
| 2. | Click clear all. HyperMesh removes all of the temp nodes. |
| 3. | To exit the panel, click return. |
Step 23: Change the rendering mode.
| 1. | To shade the model's geometry and surface edges, click  on the Visualization toolbar. The plane (purple) becomes shaded instead of wire frame. on the Visualization toolbar. The plane (purple) becomes shaded instead of wire frame. |

Step 24: Export all geometry as an IGES file.
| 1. | To open the Export Geometry tab, click File > Export > Geometry from the menu bar. |
| 2. | From the File type list, select Iges. |
| 3. | From the File field, navigate to the location of your working directory and save the file. |
| 4. | From the Units field, select an export unit system. |
| 5. | Click Export. HyperMesh generates the IGES file. |
| Note: | This file can be shared with other CAD packages such as UG, Catia, and ProE. |
See Also:
HyperMesh Tutorials


