In this tutorial, you will:
| • | Open geometry in HyperMesh Desktop |
| • | Import geometry in solidThinking Inspire |
| • | Modify geometry inside solidThinking Inspire |
| • | Export modified geometry |
| • | Import geometry back into HyperMesh Desktop |
The benefit of using solidThinking is that you can apply quick geometry fixes without going back to the CAD software.
Model Files
This exercise uses the rail_extrusion.hm file, which can be found in the hm.zip file. Copy the file(s) from this directory to your working directory.
Exercise: Modify model using solidThinking
Step 1: Open and view the model file, rail_extrusion.hm.
| 1. | Start HyperMesh Desktop. |
| 2. | From the menu bar, click File > Open > Model. |
| 3. | In the Open Model dialog, open the rail_extrusion.hm model file. |
Step 2: Export model file.
| 1. | From the menu bar, click File > Export > Geometry. |
| 2. | From the File type list, select STEP. |
| 3. | In the File field, navigate to your working directory and save the file as rail_extrusion.step. |
Step 3: Open and view the model file in solidThinking Inspire.
| 1. | Launch solidThinking Inspire. |
| 2. | From the menu bar, click File > Open. |
| 3. | In the Open File dialog, navigate to your working directory and open the rail_extrusion.step file. |
Step 4: Edit the Geometry
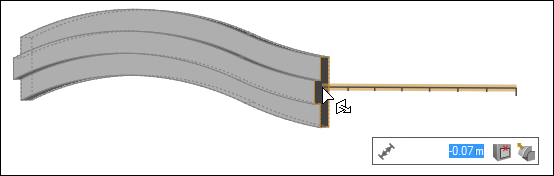
| 1. | Select the Push/Pull tool. |

| 2. | To reduce the length of the model, click on one end of the rail and push. |
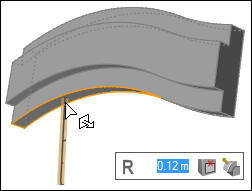
| 3. | To increase the height of the model, click on the bottom of the rail and pull it. |
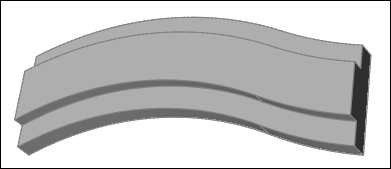
| 4. | Your modified geometry might look something like the example below. It is now ready to be transferred into HyperMesh Desktop. |
Step 5: Export geometry from solidThinking Inspire.
| 1. | From the menu bar, click File > Save As. |
| 2. | From the Save as type list, select STEP (*.stp). |
| 3. | From the File name field, navigate to your working directing and save the file. |
| 4. | Exit solidThinking Inspire. |
Step 6: Import geometry in HyperMesh Desktop.
| 2. | From the menu bar, click File > Import > Geometry. |
| 3. | From the Import tab, click  . . |
| 4. | In the Select Auto Detect file dialog, navigate to your working directory and open the rail_extrusion.stp file. |
| 5. | Click Import. The graphics area displays your modified geometry. |
Step 7 (Optional): Save your model as a HyperMesh binary file.
| 1. | From the menu bar, click File > Save As > Model. |
| 2. | In the Save Model As dialog, navigate to your working directory and save the file as a HyperMesh binary file. |
See Also:
HyperMesh Tutorials


