In this tutorial, you will learn how to:
| • | Assign a standard beam section using the Section panel. |
| • | Assign the arbitrary beam section using the HyperBeam panel. |
| • | Couple degrees of freedom. |
The steps involved include:
| • | Loading the ANSYS user profile |
| • | Retrieving the HyperMesh model files for this tutorial |
| • | Coupling DOF – Rigid elements creation |
| • | Creating standard circular beam sections |
| • | Creating arbitrary beam sections |
| • | Updating component collectors with respective beam section collectors |
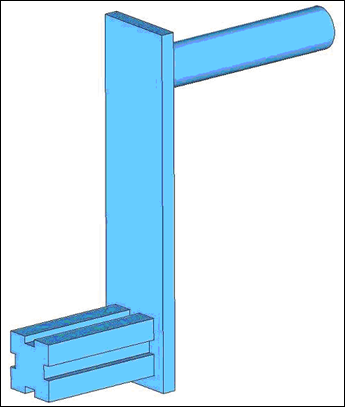
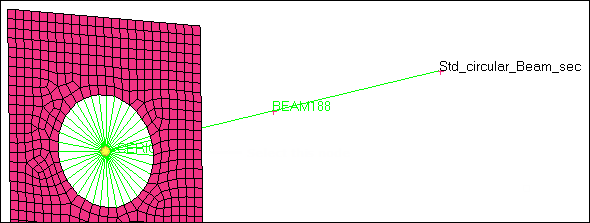
The following images are a pictorial representation of the original model. The model can be simplified in such a way that you can extract represent the entire model with a set of shell elements representing the plate part of the model and two lines indicating the beam.
Model Files
This exercise uses the chapter3.hm file, which can be found in <hm.zip>/interfaces/ansys/. Copy the file(s) from this directory to your working directory.
Exercise
Step 1: Load the ANSYS User Profile
| 1. | Start HyperMesh Desktop. |
| 2. | In the User Profile dialog, set the user profile to Ansys. |
Step 2: Retrieve the HyperMesh Model File
| 1. | From the menu bar, click File > Open > Model. |
| 2. | In the Open Model dialog, open the chapter3.hm file. The model shown above displays in the graphics area. |
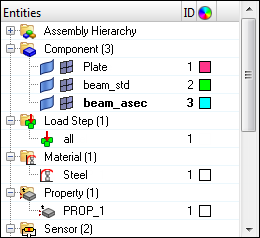
This model contains a plate collector containing shell elements. The plate component is updated with the necessary element type, real constant, and material properties.
| 3. | If your model's elements and mesh lines are not shaded, click  on the Visualization toolbar. on the Visualization toolbar. |
Step 3: Create Collectors and Attach Element Types and Materials to Them
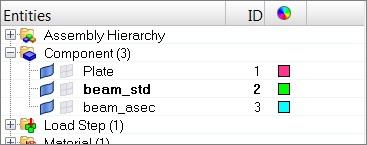
| 1. | In the Model browser, right-click and select Create > Component from the context menu. HyperMesh creates and opens a component in the Entity Editor. |

| 2. | For Name, enter beam_std. |
| 3. | Click the Color icon, and select a color. |
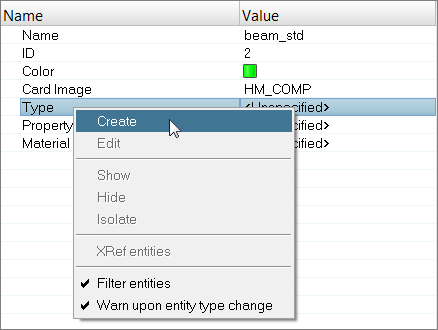
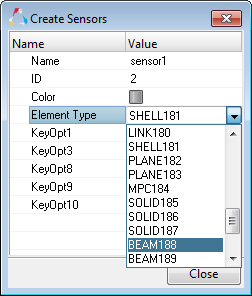
| 4. | Right-click on Type and select Create from the context menu. The Create Sensors dialog opens. |
| 5. | Set Element Type to BEAM188. |
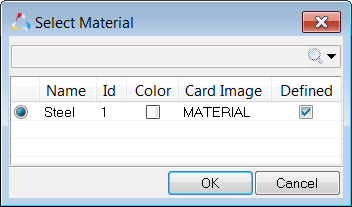
| 7. | For Material, click Unspecified >> Material. |
| 8. | In the Select Material dialog, select Steel and then click OK. |
| 9. | In the Model browser, right-click and select Create > Component from the context menu. HyperMesh creates and opens a component in the Entity Editor. |
| 10. | For Name, enter beam_asec. |
| 11. | Click the Color icon, and select a new color. |
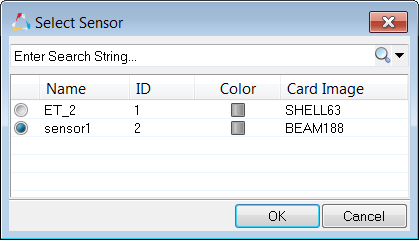
| 12. | For Type, click Unspecified >> Sensor. |

| 13. | In the Select Sensor dialog, select sensor1 (BEAM188) and then click OK. |
| 14. | For Material, click Unspecified >> Material. |
| 15. | In the Select Material dialog, select Steel and then click OK. |
Step 4: Create a Beam Element
In the Model browser, notice that the current component is beam_asec.
| 1. | Opens the Bars panel by clicking Mesh > Create > 1D Elements > Bars from the menu bar. |
| 2. | Go to the bar2 subpanel. |
| 3. | Set orientation to plane. |
| 4. | Set Beam Y Axis to parallel to XY. |
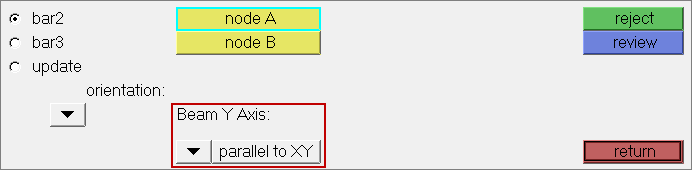
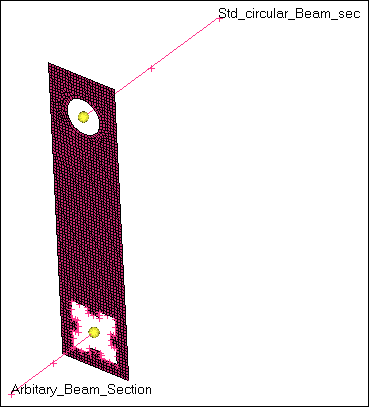
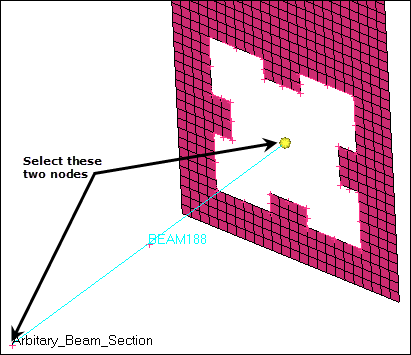
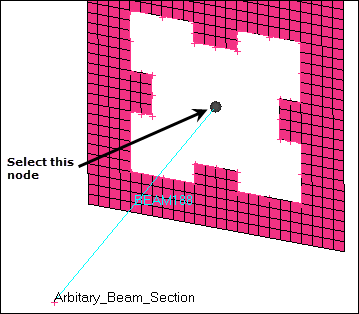
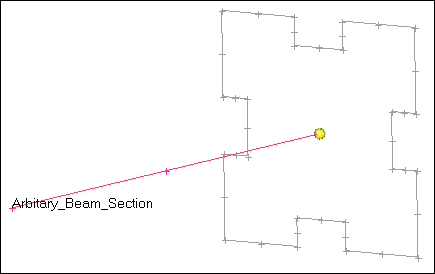
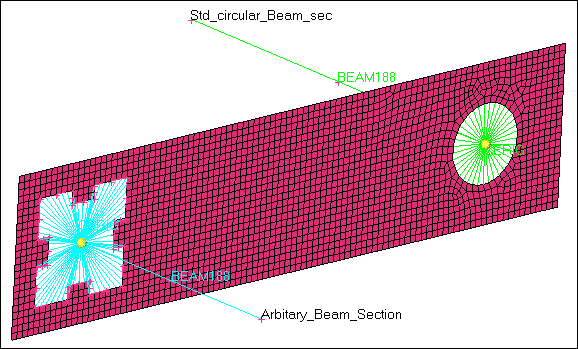
| 5. | Using the node A and node B selectors, select the two nodes that form the ends of the Arbitary_Beam_Section line as indicated in the following image. HyperMesh creates a BEAM188 element. |
| Note: | Arbitary_Beam_Section is shown as a tag in the graphics area. |
| 6. | In the Model browser, Component folder, right-click on beam_std and select Make Current from the context menu. |
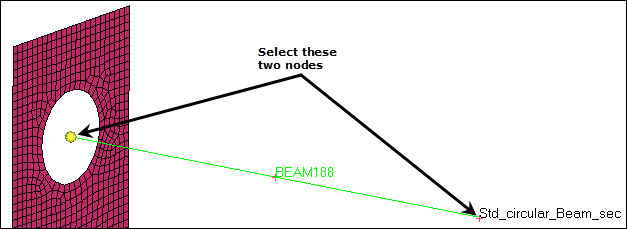
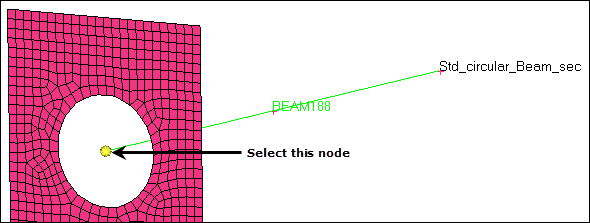
| 7. | Using the node A and node B selectors, select the two nodes that form the ends of the Std_circular_Beam_sec line as indicated in the following image. HyperMesh creates a BEAM188 element. |
| 8. | Click return to exit the bar2 panel. |
Step 5: Create Coupled DOF - Rigid Elements
| 1. | Open the Rigids panel by clicking Mesh > Create > 1D Elements > Rigids from the menu bar. |
| 2. | Set the dependent selector to multiple nodes. |
| 3. | Select all of the dof checkboxes. |
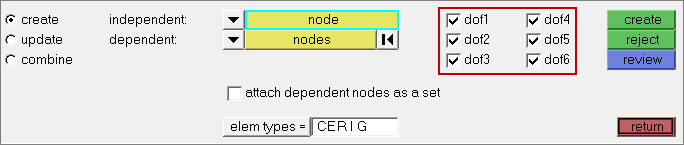
| 4. | Set elem types to CERIG. |
| 5. | In the Model browser, Component folder, right-click on beam_asec and select Make Current from the context menu. |
| 6. | Activate the independent selector set to node. |
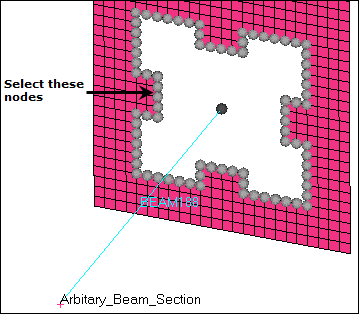
| 7. | On Arbitary_Beam_Section, select the independent node at the end of the beam element as indicated in the following image. |
| 8. | Click dependent: nodes >> by path. |
| 9. | On the plate component, select the dependent nodes indicated in the following image. |

| 11. | In the Model browser, Component folder, right-click on beam_std and select Make Current from the context menu. |
| 12. | Activate the independent selector set to node. |
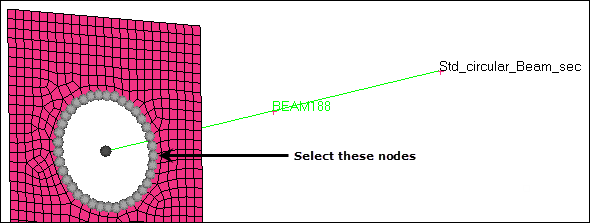
| 13. | On Std_circular_Beam_sec, select the independent node at the end of the beam element as indicated in the following image. |
| 14. | Click dependent: nodes >> by path. |
| 15. | On the plate component, select the dependent nodes indicated in the following image. |
| 17. | Click return to exit the Rigids panel. |
Step 6: Create and Attach a Standard Circle Property to a Component
| 1. | In the Model browser, Component folder, click beam_std. The Entity Editor opens and displays the component's corresponding data. |
| 2. | Right-click on property and select Create from the context menu. The Create Properties dialog opens. |
| 3. | For Name, enter Circular_Sec. |
| 5. | Under SECDATA, enter 15 for R. |
| 6. | Click Close. HyperMesh assigns the property Circular_Sec to the component beam_std. |
Step 7: Create an Arbitrary Property
| 1. | In the Model browser, right-click and select Create > Property from the context menu. HyperMesh creates and opens a property in the Entity Editor. |
| 2. | For Name, enter arbi_sec. |
| 3. | Set Card Image to SECTYPE. |
| 4. | In the Model browser, Component folder, click  next to beam_std, beam_asec, and Plate to turn off the display of their elements. next to beam_std, beam_asec, and Plate to turn off the display of their elements. |
| Note: | You should only see geometric entities in the graphics area. |
| 5. | Open the HyperBeam panel by clicking Properties > HyperBeam from the menu bar. |
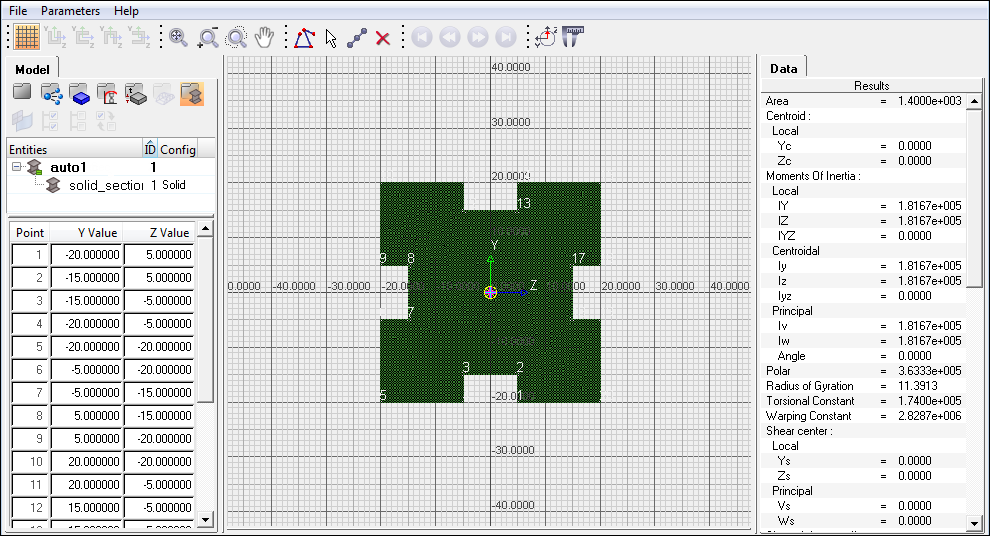
| 6. | Go to the solid section subpanel. |
| 7. | Set the entity selector to lines. |
| 8. | Select all of the lines (displayed in gray in the following image) that form the Arbitrary_Beam_Section. |
| 9. | Set section base node to centroid. |
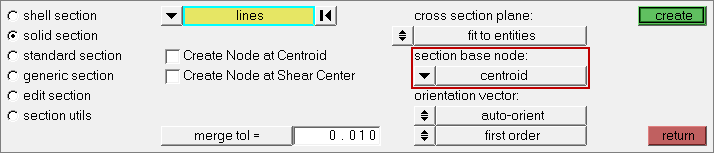
| 10. | Click create. The HyperBeam Data Model dialog opens, meshes the area enclosed by the selected lines with quadrilateral elements, and calculates the properties using these elements. |
| 11. | Return to HyperMesh by clicking File > Exit from the menu bar. |
| 12. | Click return to exit the HyperBeam panel. |
| 13. | In the Model browser, Properties folder, click arbi_sec. The Entity Editor opens and displays the beam section's corresponding data. |
| 14. | For Hyper beam section [OPTIONAL], click Unspecified >> Beamsection. |

| 15. | In the Select Beamsection dialog, select solid_section.0 and then click OK. |
Step 8: Update the Component Collector with the Beam Section
| 1. | In the Model browser, Component folder, click beam_asec. The Entity Editor opens and displays the component's corresponding data. |
| 2. | For Property, click Unspecified >> Property. |
| 3. | In the Select Property dialog, select arbi_sec and then click OK. HyperMesh attaches this property to the component. |
| 4. | In the Model browser, click  to display all of the entities in the graphics area. to display all of the entities in the graphics area. |
Step 9: Save you Work
| 1. | From the menu bar, click File > Save As > Model. |
| 2. | In the Save Model As dialog, navigate to your working directory and save your file. |
Step 10: Export the Deck to ANSYS *.cdb Format.
| 1. | Open the Export tab by clicking File > Export > Solver Deck from the menu bar. |
| 2. | Set File type to Ansys. |
| Note: | If you are in the ANSYS user profile, HyperMesh automatically sets the File type to Ansys and loads ANSYS as the default Template. |
| 3. | In the File field, navigate to your working directory and save the file as 4450_export.cdb. |
See Also:
HyperMesh Tutorials