HM-3625: Morph a Symmetric Part onto a New Geometry |

|

|

|

|
|
HM-3625: Morph a Symmetric Part onto a New Geometry |

|

|

|

|
HM-3625: Morph a Symmetric Part onto a New Geometry |

|

|

|

|
|
HM-3625: Morph a Symmetric Part onto a New Geometry |

|

|

|

|
Update the mesh to a new geometry quickly using symmetry.
This exercise uses the fe_only.hm and new_design.igs files, which can be found in the hm.zip file. Copy the file(s) from this directory to your working directory.
3-D domains, symmetry, interactive morphing.
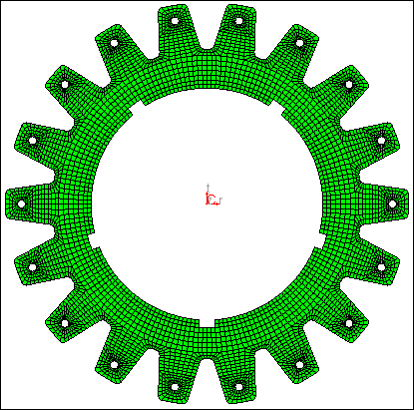
Figure 1: Mesh to morph
Step 1: Load the model.
| 1. | From the menu bar, select File > Open > Model and load the file fe_only.hm. |
| 2. | From the menu bar, select File > Import > Geometry and load the file new_design.igs. |
Step 2: Create domains and handles.
| 1. | From the menu bar, select Morphing > Create > Domains. |
| 2. | Switch the domain type from global domains to 3D domains. |
| 3. | Toggle the element selector to all elements. |
| 4. | Activate the partition 2D domains option. |
| 5. | Click create to create the domains. |
| 6. | Select return to exit the panel. |
Step 3: Create symmetries.
| 1. | From the menu bar, select Morphing > Create > Symmetries to enter the Symmetry panel. |
| 2. | Switch the symmetry type to cyclical. |
| 3. | Switch the symmetry angle from 180 degrees to set freq. |
| 4. | Set the # of cycles to 18. |
| 5. | Click syst. |
| 6. | Select the center point of the gear. |
| 7. | Click domains >> all. |
| 8. | Click create. |
| 9. | Click return. |
Step 4: Morph the mesh to the new geometry.
| 1. | From the menu bar, select Morphing > Morph , then select the move handles subpanel. |
| 2. | Zoom in to one of the cogs of the gear as in the following image: |
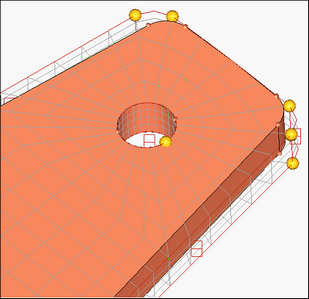
Figure 2: Mesh, domains handles and the new geometry
| 3. | Switch the morphing method to move to point. |
| 4. | With from: handle active, select the node depicted in the following image. |
| 5. | With to: point active, select the point on the geometry you want to move the handle to, as depicted in the following image: |
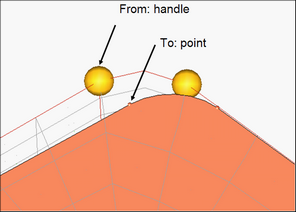
Figure 3: Morphing handle to point
As the handles are moved, you will see that the mesh starts conforming to the new geometry.

Figure 4: Mesh mapped onto the new geometry
| 6. | In the same manner, move the following handles: |
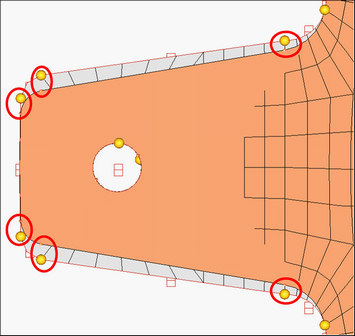
Figure 5: Handles to map
| 7. | Return to the main menu. |
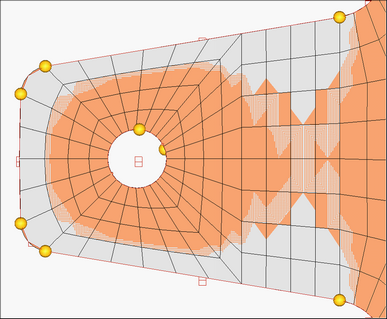
Figure 6: Updated (morphed) mesh
Notice how each cog on the gear is updated. Taking advantage of the symmetry in this part, you are able to morph it much quicker.