Planar symmetry is similar to linear symmetry accept that it reduces two dimensions instead of one. This enables you to morph your model along a single axis with only two or more handles.
To create a planar symmetry:
| 1. | From the HyperMorph module, select the Systems panel. |
| 2. | Create a system with the x-axis pointing along the dimension to be retained. |
| 3. | Return to the HyperMorph module, select the Symmetry panel. |
| 6. | Select the global domain icon. |
| 7. | Switch the selector from linear to planar. |
| 8. | Select the system you created. |
| 9. | Select x-axis as the axis to align the symmetry. |
| 11. | Return to the HyperMorph module. |
| 12. | Select the Symmetry panel. |
| 13. | Select update by domain. |
| 14. | Select the global domain. |
| 15. | Select the planar symmetry. |
A planar symmetry is created and the other two symmetries from the global domain are removed. You are allowed to have any number of symmetries associated with a domain and all will apply, but combining linear and planar symmetry in the same direction results in an unrealistic situation and poor influence calculations.
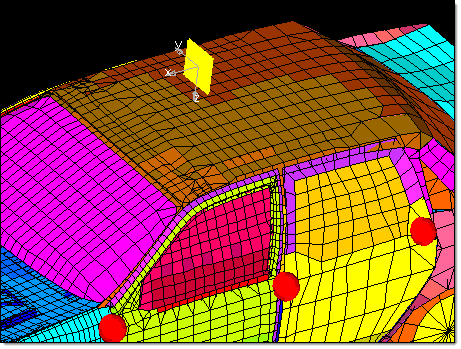
The planar symmetry icon is displayed as a filled-in rectangle perpendicular to the system x-axis. Now each handle acts on the mesh as if it were a plane perpendicular to the x-axis. If two handles lie in a plane perpendicular to the system x-axis, they will be linked through symmetry. When you move a handle, all the nodes and handles with the same x coordinates will move along with it.
| Note: | Since planar is a non-reflective type of symmetry, leaving symlinks unchecked will not prevent the handles from having linear influences. However, it will stop movements from one handle from being applied to others. If you wish to turn the symmetry off for a given morphing operation, make the symmetry inactive in the Morph Options panel. |

System and planar symmetry
The planar symmetry icon is a plane perpendicular to the system x-axis. Note that the placement of a planar symmetry system does not matter, the effect of the planar symmetry system is determined only by the direction of the x-axis.
Applying a planar symmetry greatly simplifies a model. Essentially, it reduces the model to a lying along single axis. This symmetry type is very useful for changing dimensions along one axis through the entire model.

Using planar symmetry
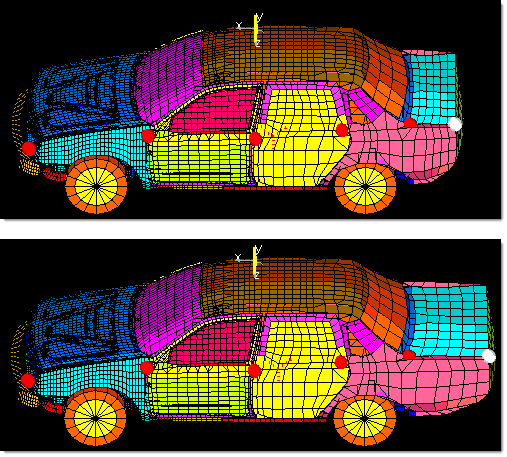
The handle at the rear of the model is selected and the entire trunk of the car is morphed. With planar symmetry you only need a row of handles lying roughly along the planar symmetry system x-axis.
See Also:
Creating Handles and Domains
Controlling Global Morphing with Handle Placement
Matching a Mesh, Line, or Surface Data
Making Parametric Changes
Mirror Images - Using 1-Plane Symmetry
Reducing 3D to 2D - Using Linear Symmetry


