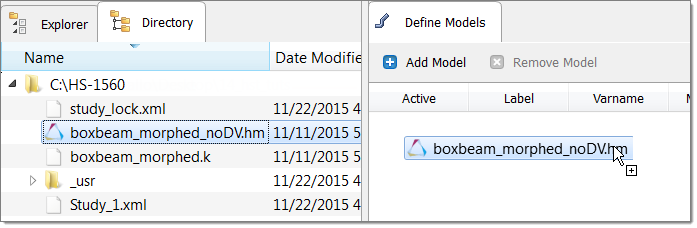
| 1. | Click Add Output Response. |
| 2. | In the HyperStudy - Add dialog, add three output responses and label them Energy, Force, and Mass. |
| 3. | In the Expression column of the output response Energy, click  . . |
| 4. | In the Expression Builder, click the Functions tab. |
| 5. | From the list of available functions, select max. |
| 6. | Click Insert Varname. The function max()appears in the Evaluate Expression field. |
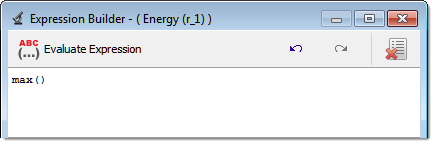
| 7. | Click the File Sources tab. |
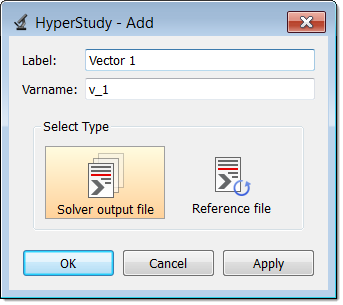
| 9. | In the HyperStudy - Add dialog, add one Solver output file. |
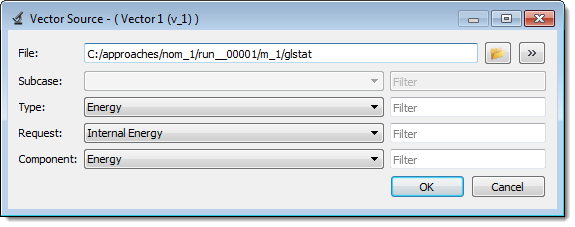
| 10. | In the File column of Vector 1, click . |
| 11. | In the Vector Source dialog, navigate to the approaches/nom_1/run__00001/m_1 directory and open the glstat file. |
| 12. | From the Type, Request, and Component fields, select the options indicated in the image below. |
| 14. | Click Insert Varname. The expression max(v_1[0]) appears in the Evaluate Expression field. |
| 15. | Remove [0] from the expression, so that it reads max(v_1). This expression produces the value of the energy value extracted from the nominal run. |
| 17. | Repeat steps 3 through 10 for the Force output response. |
| 18. | In the Vector Source dialog, navigate to the approaches/nom_1/run__00001/m_1 directory and open the binout0000 file. |
| 19. | From the Subcase, Type, Request, and Component fields, select the options indicated in the image below. |
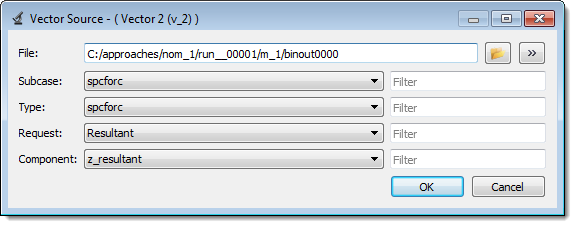
| 21. | Click Insert Varname. The expression max(v_2[0]) appears in the Evaluate Expression field. |
| 22. | Remove [0] from the expression, so that it reads max(v_2). This expression produces the value of the Force value extracted from the nominal run. |
| 24. | In the Expression column of the output response Mass, click . |
| 25. | In the Expression Builder, click the ASCII Extracts tab. |
| 26. | Click Add Extract Source. |
| 27. | In the HyperStudy - Add dialog, add one extract source. |
| 28. | In the File Path column of FileParser1, click . |
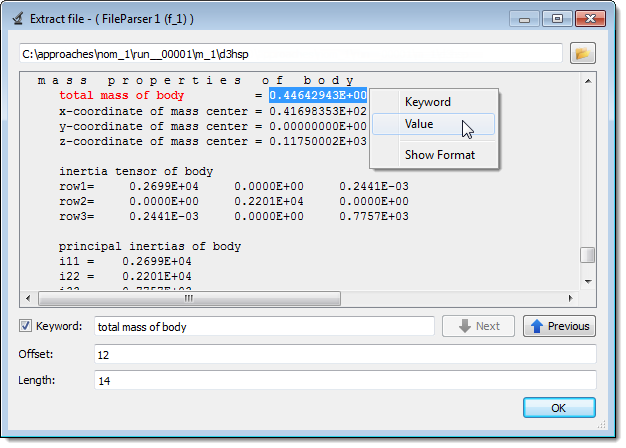
| 29. | In the Extract File dialog, navigate to the approaches/nom_1/run__00001/m_1 directory and open the d3hsp file. |
| 30. | To search for certain keywords within the d3hsp file, select the Keyword checkbox. |
| 31. | In the Keyword field, enter total mass of body. |
| 32. | Click Next. HyperStudy locates total mass of body in the file. |
| 33. | Highlight the value for total mass of body. |
| 34. | Right-click on the highlighted fields, and select Value from the context menu. |
| 36. | Click Insert Varname. The expression f_1[0] appears in the Evaluate Expression field. This expression produces the value of the Mass value extracted from the nominal run. |
| 38. | Click Evaluate Expressions to extract the output response values. |
| 39. | Go to the Post processing step. |
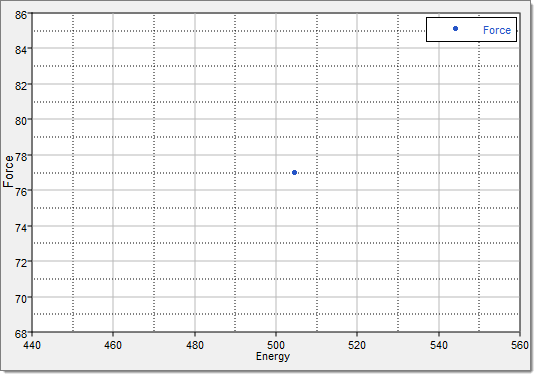
| 40. | Click the Scatter 2D tab to view the values of the output responses, and to check that your output responses have similar values. |
Use the Channel selector to set the X Axis to Energy and the Y Axis to Force.
| Note: | The version and architecture of LS-DYNA that you are using may produce slightly different output response values. |
|