This tutorial demonstrates how to perform an optimization study in which the input variables are entered and the output responses are calculated in a Microsoft Excel spreadsheet. The Excel spreadsheet LandingBeamCalc_Public.xls file can be found in <hst.zip>/HS-4415/ and copied to your working directory. To watch a demonstration video of this tutorial, click here.
The objective is to find the cross-sectional dimensions of a tapering I- beam at its three sections that minimize the total cross-sectional area while meeting the margin of safety requirements for buckling, crippling, and combined bending and shear under ten loadcases.
The spreadsheet used here contains a page with the initial design and separate pages for crippling, buckling, and combined bending and shear calculations.
| 1. | In Excel, open the LandingBeamCalc_Public.xls spreadsheet. |
| 2. | Review the information, and locate the columns that contain the input variables and output responses. |
| Note: | When creating a Spreadsheet model for HyperStudy on a Mac or Windows platform, variable labels should only contains English characters, or a combination of English characters and numbers. |
|
| 2. | To start a new study, click File > New from the menu bar, or click  on the toolbar. on the toolbar. |
| 3. | In the HyperStudy – Add dialog, enter a study name, select a location for the study, and click OK. |
| 4. | Go to the Define models step. |
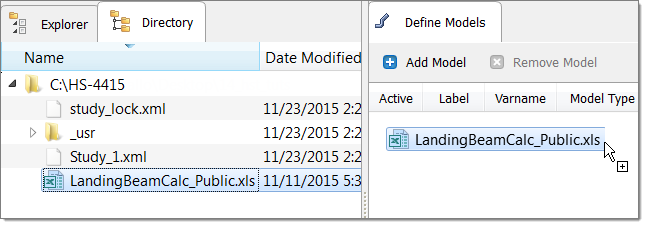
| 5. | Add a Spreadsheet model by dragging-and-dropping the LandingBeamCalc_Public.xls file into the work area. |
The Solver input file column displays hst_input.hstp, this is the name of the solver input file HyperStudy writes during any evaluation. The Solver execution script column now displays SpreadSheet_HST.
| 6. | Optional. If a firewall prompt dialog appears, click Allow. |
| 7. | Click Import Variables. The LandingBeamCalc_Public.xls spreadsheet opens. |
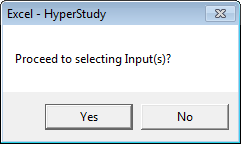
| 8. | In the Excel - HyperStudy dialog, click Yes to begin selecting input variables. |
| 9. | In the spreadsheet, select the cells AA_w1, AA_w2, and AA_w3 in Section AA, along with their corresponding values. |
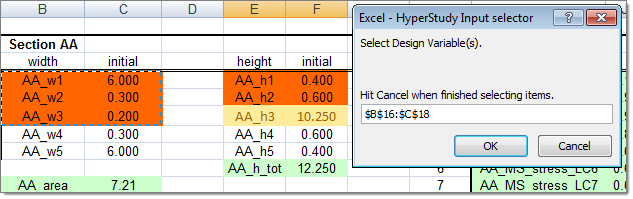
| 10. | In the Excel - HyperStudy Input Selector dialog, click OK. |
| • | Section AA: AA_h1 and AA_h2 |
| • | Section CC: CC_w1, CC_w2, CC_w3 |
| • | Section CC: CC_h1, CC_h2 |
| • | Section EE: EE_w1, EE_w2, EE_w3 |
| • | Section EE: EE_h1, EE_h2 |
| 12. | Click Cancel to stop selecting input variables from the spreadsheet. |
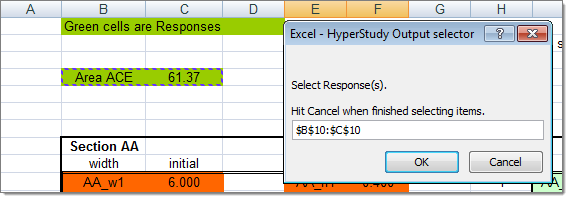
| 13. | In the Excel - HyperStudy dialog, click Yes to begin selecting output responses. |
| 14. | In the spreadsheet, select the cell AA_MS_BS in Section AA, along with its corresponding value. |
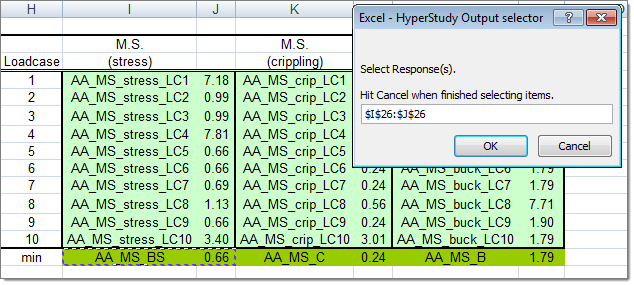
| 15. | In the Excel - HyperStudy Output Selector dialog, click OK. |
| • | Area ACE value from cell C10 (illustrated in the image below): |
| 17. | Click Cancel to stop selecting output responses from the spreadsheet. Fifteen input variables and ten output responses are imported from the LandingBeamCalc_Public.xls spreadsheet. |
| 18. | Go to the Define Input Variables step. |
| 19. | Review the input variable's lower and upper bound ranges. |
| 20. | Go to the Specifications step. |
|
| 1. | In the work area, set the Mode to Nominal Run. |
| 3. | Go to the Evaluate step. |
| 4. | Click Evaluate Tasks. An approach/nom_1/ directory is created inside the study directory. The approaches/nom_1/run__00001/m_1 sub-directory contains the sse_output.csv file, which is the results file of the nominal run. |
| 5. | Go to the Define Output Responses step. |
|
| 1. | In the Explorer, right-click and select Add Approach from the context menu. |
| 2. | In the HyperStudy - Add dialog, select Optimization and click OK. |
| 3. | Go to the Select Input Variables step. |
| 4. | Review the input variable's lower and upper bound ranges. |
| 5. | Go to the Select Output Responses step. |
| 7. | In the HyperStudy - Add dialog, add one objective. |
| b. | Set Apply On to Area ACE (r_10). |

| 9. | Click the Constraint tab. |
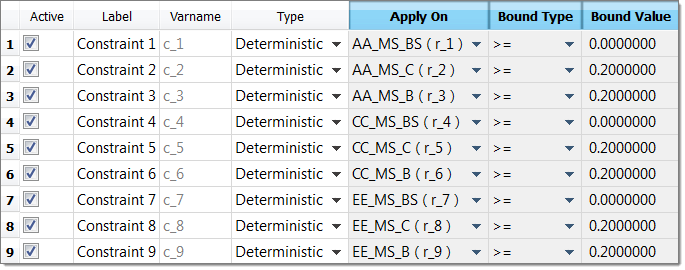
| 11. | In the HyperStudy - Add dialog, add nine constraints. |
| 12. | Define Constraint 1 through Constraint 9 by selecting the options indicated in the image below from the Apply On, Bound Type, and Bound Value columns. |
| 14. | Go to the Specifications step. |
| 15. | In the work area, set the Mode to Sequential Quadratic Programming (SQP). |
| Note: | Only the methods that are valid for the problem formulation are enabled. |
| 17. | Go to the Evaluate step. |
| 18. | Click Evaluate Tasks to launch the optimization. |
|
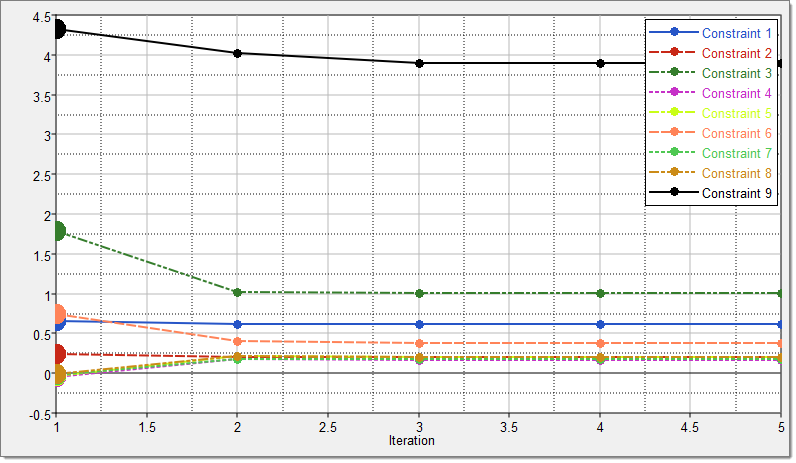
| 1. | Click the Iteration Plot tab to monitor the evolution of the objective function and constraints vs. the iterations. |
| 2. | Using the Channel selector, select Constraint 1 through Constraint 9. The Optimization iteration history of the constraints is plotted. |
|
See Also:
HS-1810: Post Proceesing with HyperStudy
HyperStudy Tutorials


