Set Panel |

|

|

|

|
|
Set Panel |

|

|

|

|
The Set panel allows you to create, import, and export sets (or groups) of components (parts), elements, and nodes. You can also import HyperView set definition files, Animator3 session files, LSPost set files, Patran session files, or Nastran/OptiStruct set files into HyperView, as well as export HyperView set definition files, Patran session files, Nastran set files, or OptiStruct set files.
To access the Set panel, click the Set button ![]() on the Visualization toolbar.
on the Visualization toolbar.

Set panel
Sets can be created using the panel options or by using any of the following methods:
| • | From the Model menu, select Create > Sets. |
OR
| • | Right-click in the graphics area and select Create > Set from the context menu. |
OR
| • | Right-click in the Results browser and select Create > Set from the context menu. |
You can create as many sets (groups) as you want, and the same entity can exist in multiple sets. All component/part (only) set types that are created will be displayed in the entity list tree in the Entity Attributes panel, and in the Results browser. Click the Entity drop-down menu and select Sets to view the groups and their components.
The type of a newly created set, is based on the entity type that is displayed on the Selection input collector. When a different type of set (group) is selected from the Sets list, the entity type shown on the Selection input collector is updated to correspond with the new set type that was chosen. Conversely, if the input collector type is changed, the set type of the highlighted group will be converted to the new set type that was chosen. For example, if the input collector of a component group is switched from Components to Nodes, all the nodes of the original components become the entities of the set. The set type is automatically updated, based on the entity type that is selected using the Selection input collector.
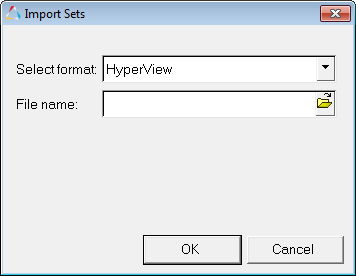
To import a set click Import or select the Import > Sets option from the Tools menu.

Import Sets dialog
From the Import Sets dialog, select a file type from the Select format drop-down menu, browse to the file that you would like to import and select it, click Open, and then click OK to import the file and close the dialog.
| Note | In order to import sets in any format, you must first load a model. You can import more than one of these files into the same session. |
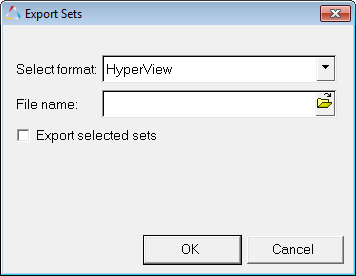
To export a set, click Export or select the Export > Sets option from the Tools menu.

Export Sets dialog
From the Export Sets dialog, select a file type (HyperView, Patran, Nastran, or OptiStruct) from the Files of type drop-down menu, type in a file name, browse to where you would like to save the file, click Save, and then click OK. The exported file is saved as a text file. You can also activate the Export selected sets check box if you would like to export only selected sets in the panel to the file.
| Note | When exporting, HyperView will automatically export the ID ranges contained in the set instead of writing out the individual IDs. |
HyperView group definition files can be edited. In addition, the contents of a saved set file can be added, removed, or modified using the session file.
Sets List |
On the left-most side of the panel is the Sets list. Activating the check box next to the set will display it in the graphics area. The set type is also shown in this listing. You can sort the items in the Sets list by clicking on the Sets or Type headings. Note: Some file formats include sets (groups) defined by the user, or the solver software. These groups will be available in the Sets list after importing the model data. |
Add |
Adds a set to the list. The newly added set is automatically labeled, and is added to the bottom of the list. To change the name of a set that you added, right click on the current name, select Rename from the context menu, enter a new name into the Rename dialog, and click OK. |
Delete |
Deletes the selected set (or sets) from the list. |
Keyboard shortcuts are also available for selecting items within the list:
|
||||||
|
||||||
In addition, you can access the following options by right-clicking anywhere within the Sets list:
|
Delete |
Deletes the selected set (or sets) from the list. |
Rename |
Displays the Rename dialog, which allows you to rename the selected set. |
Show |
Displays the selected set (or sets) in the graphics area and activates the corresponding check box(s). |
Hide |
Hides the selected set (or sets) in the graphics area and deactivates the corresponding check box(s). |
|
|
Selection |
The input collector allows you to select, or change, the entity type of a set. |
Show ID |
Allows you to display the IDs of selected entities in a group. |
Color |
Allows you to change the color of the feature lines of the selected entities in a set. |
Draw style |
Allows you to select the drawing style for the active set: |
|
shaded |
Shades the components in the active set the color currently displayed in the Color box. If a contour is applied, the components in the set will display their contour color instead of the selected shaded color. |
|
wire |
Draws a wireframe on the elements or components in the active set. |
|
point |
Draws the nodes in the set using 2-D pixels. |
|
sphere |
Draws the nodes in the set using 3-D pixels. |
Draw size |
Change the thickness of the wire and the size of the point/sphere drawing for the active set. |
Number of entities |
Lists the number of entities in the active set. |
|
|
Action: Add/ |
Toggle the Add to Set/Remove from Set button between the two available button options. |
Add to Set/ |
Adds or removes selected entities to/from a set. |
Clear |
Clears the selected entities of the active set, allowing you to redefine the set. |
|
|
Import |
Import a HyperView set definition file, Animator3 session file, LSPost set file, Patran session file, or Nastran/OptiStruct set file. This button will be inactive if no model file is loaded. In addition, the Import > Sets option in the Tools menu will not allow the importing of any files, if no model file is loaded. |
Export |
Export a HyperView set definition file, Patran session file, Nastran set file, or OptiStruct set file. The exported file is saved as a text file. This button will be inactive if no model file is loaded. In addition, the Export > Sets option in the Tools menu will not allow the exporting of any files, if no model file is loaded. |
A sample Set File is shown below:
//////////////////////////////////////////////////////////// // // HyperWorks // fileName // // Group Definition // *Group "group label" "group type" "group color(RGB)" // *Pool "pool type" // id1 id2 ... idn // //////////////////////////////////////////////////////////// *Group "Group 1" "node" "255 255 0" *Pool "Node" 3979 9332 9625 *Group "Group 2" "element" "255 0 255" *Pool "ELEMENT_SHELL" 18128 18145 18162 *Group "Group 3" "part" " 0 255 0" *Pool "Line" 132 *Pool "Solid" 103 *Pool "Shell" 124 |
How Do I...
|
|
Note - You can also access the Import Sets dialog by selecting the Import > Sets option from the Tools menu.
|
Note: This file can then be imported, by clicking Import in the Set panel. |