In this tutorial, you will learn how to:
| • | View multiple iso values in the Contour panel |
| • | View a single iso value in the Iso panel using Contour panel settings |
| • | View iso values using displacement results |
Tools
To access the Iso panel:
| • | Click the Iso panel button  on the Result toolbar. on the Result toolbar. |
OR
| • | Select Results > Plot > Iso from the menu bar. |

The iso surfaces can be viewed from the Contour panel as well as the Iso panel. Choosing Show Iso Value from the Contour panel will allow you to view the iso surfaces according to the contour legend settings for the applied result type. On the other hand, the Iso panel allows you to automatically mask elements based on a user defined value for the result type that is applied in the panel. By using the option Use Contour Settings in the Iso Panel, you can view the iso surfaces for the results as applied in the Contour panel.
Exercise: Using the Iso Panel
This exercise uses the model file, bullet_local.op2.
Step 1: Viewing iso surfaces from the Contour panel.
| 1. | Load the bullet_local.op2 file, located in the animation folder. |
| 2. | Click the Contour panel button  on the Result toolbar to enter the Contour panel. on the Result toolbar to enter the Contour panel. |
| 3. | Contour the model for vonMises stresses, using Simple averaging. |
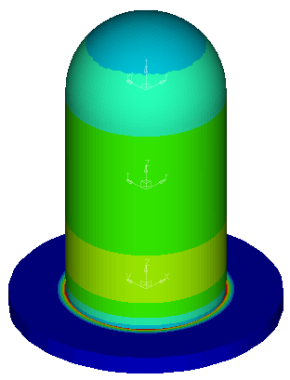
| 5. | Click Show Iso Value to view the iso surfaces while remaining in the Contour panel. |
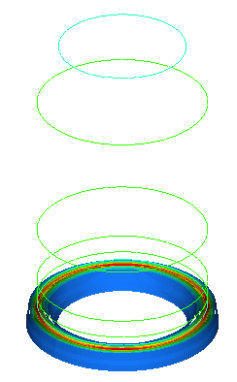
| 6. | Click Clear Iso Value to return the model to the original shape. |
Step 2: Viewing iso surfaces in the Iso panel using Contour settings.
After you have created a contour of a model, you can view a single iso surface in the Iso panel.
| 1. | Click the Iso panel button  from the Result toolbar to enter the Iso panel. from the Result toolbar to enter the Iso panel. |
| 2. | Click the Use Contour Settings button (located in the middle of the panel) to use the settings that you previously entered in the Contour panel. |
| 3. | Verify that Show values is set to Above. |
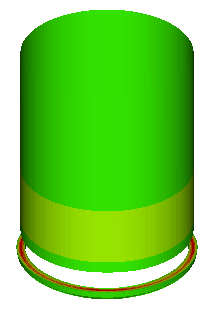
| - | Show the model above the iso values and adjust the view using the slider bar. |
| 5. | Move the slider bar under Current value to change the iso value of interest. |
| 6. | Click in the graphics area and press ‘T’ on the keyboard. |
A transparent view of the part of the model that is excluded from the iso surface is displayed.
| 7. | Press ‘T’ again to turn off transparent view. |
| 8. | Click Clear Iso to clear the iso values from the model. |
Step 3: View iso values using displacement results.
| 1. | Change the Result type to Displacement (v). |
| 3. | For Current Value enter 2.468e-06 and press ENTER. |
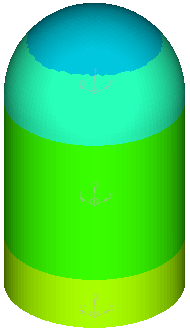
You are viewing the contour in stresses, however the iso is operated using displacements. The movement of the slider bar is controlling the displacement result values while the stresses are displayed on the iso surfaces.
|
Step 4: View iso values on specified components.
| 1. | Under Selection, click on the Components input collector. |
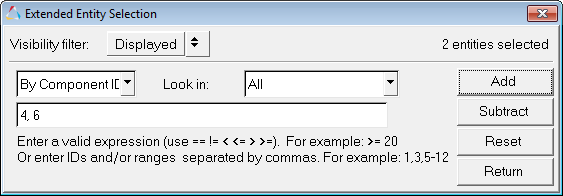
| 2. | From the Extended Entity Selection menu, click By ID (in order to select the specific components to apply the iso surface on). |
| 3. | Enter the values 4, 6 in the text box and click Add. |
The By ID dialog will show that two entities have been added to the selection (in the upper right corner).
| 4. | Click the Return button. |
| 5. | Click on the Components input collector again, and this time select Reverse. |
This reverses the selection so that all of the components except those with ID 4 and 6 are selected.
| 6. | Click Apply to apply the iso surface to only the selected components. |
| 7. | Update the Current Value to 2.468e-06 and press ENTER. |
Notice how the iso value plot is only applied to the selected components.
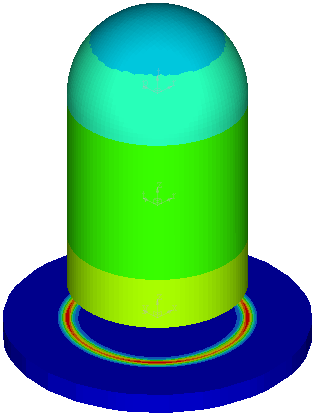
| 8. | Compare this plot to the previous plot. Observe that the two components which were not selected are shown and have not been removed from the iso plot. |
See also
Iso Panel
Contour Panel
HyperView Tutorials for a complete list of HyperView tutorials


