|
»Click here to display Table of Contents«
|

AutoAirSpring |

|

|

|

|
|
AutoAirSpring |
|
|
|

|
|
»Click here to display Table of Contents«
|
AutoAirSpring |
|
|
|
|
|
AutoAirSpring |
|
|
|
|
Air springs are commonly used in trucks, buses, and rail vehicles because their internal air pressure can be increased or decreased to adjust for the load carried while maintaining ride height. Typically a valve on the chassis is mechanically linked to an axle and if the ride height is too low the value opens to admit high pressure air to the spring from a compressor, until the ride height increases enough to close the value. Conversely if the ride height is too high the value vents air from the spring to atmosphere until the ride height decreases enough to close the value. The value has a dead band so that typical suspension ride and roll motions do not open the valve.
In some cases, air springs are used as actuators to lower and raise an axle and tires. When a truck is heavily loaded, the air spring is inflated to push the axle's tires into the road and spread the load over a greater area of road.
In other cases, air springs may connect with each other or to a reservoir. The additional volume of a reservoir, for example, decreases the spring rate since for a change in ride height the incremental change in volume as fraction of the total volume is smaller. When springs connect to one another or to a reservoir, then the resistance to flow between the springs or the spring and reservoir may be tuned to give a frequency dependent response.
To use AutoAirSprings you must load the MBD-Vehicle Dynamics Tools preference file. Once loaded, HyperWorks remembers and automatically loads the MBD-Vehicle Dynamics Tools preference file each time you start HyperWorks. Click here to learn how to load the MBD-Vehicle Dynamics Tools preference file.
To add an airspring or pair of airsprings to your model follow these steps:
| 1. | Right-click on Model in the Project browser and select Add Auto Entity from the context menu. |
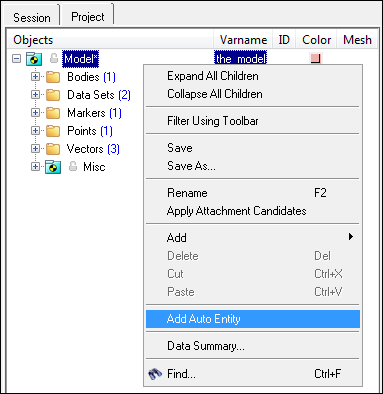
The Add Entity dialog is displayed.
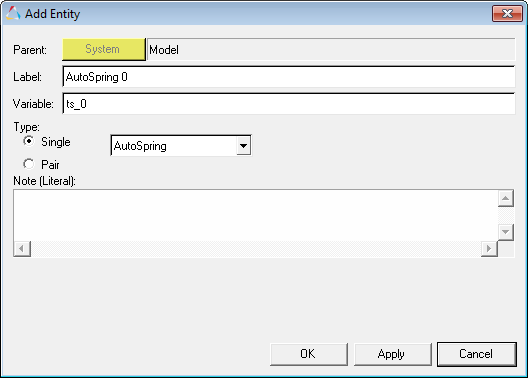
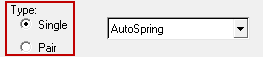
| 2. | Select the required radio button (single or pair) that needs to be created under the Type section. |
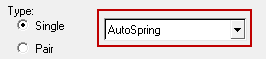
| 5. | After selecting the type, select either AutoAirSpring or AutoAirSpringPair from the drop-down menu in order to create an AirSpring entity. |
The AirSpring panel is displayed in the panel area.
The AutoAirSpring panel is shown in the image below:

The parameters available in the AirSpring Properties tab are explained in the table below:
Properties |
Description |
|---|---|
Trim Load |
The trim load is the force applied by air spring when the spring height is the trim height. MotionSolve determines the static internal air spring pressure that yields the trim load at the trim height according to the data in the air spring property file. |
Trim Height |
Enter the desired spring height in the trim load. With the given trim load and trim height, MotionSolve determines the static internal spring pressure from the data in the air spring property file. |
Force Scale |
Enter a positive real value to scale the air spring force. Use the force scale to increase or decrease the spring stiffness. Note - The trim load is not scaled. |
Displacement Scale |
Enter a positive real value to scale the spring height, as air springs have a non-linear forces-vs-height relationship, the change in force will be non-linear. Note - The trim height is not scaled. |
Outputs |
The Outputs check box is used to add output requests for the air spring force, displacement, and velocity. |
Use Bumpstop |
Activate the Use Bumpstop check box to add a bumpstop that limits spring deflection. |
Property File |
The Property File option is used to browse and select the required Air Spring Property (.asg) file, giving the spring force verses displacement at different nominal internal pressures. |
Edit File |
The Edit File option is used to edit the air spring property (.asg) file and save the edited file. |
Update Graphic |
The Update Graphic is used to update the graphics for the edited air spring property (.asg) file. |
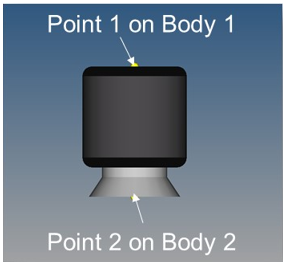
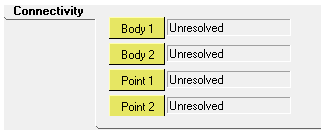
Use the Body 1, Body 2, Point 1, and Point 2 collector buttons in the AutoAirSpring panel to select the bodies and points at which the air spring acts between. Typically, air springs act between the chassis and an axle. Point 1 on Body 1 defines the top of the air spring, while Point 2 on Body 2 defines the bottom of the air spring as shown in the figure below:
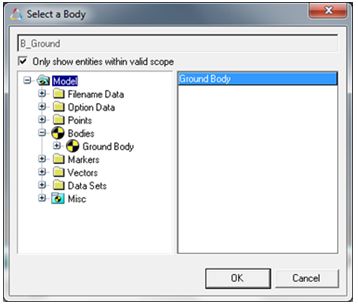
| 1. | Click the Body 1 input collector and select a body from the graphical-view of the model. |
Or
Double click the Body 1 button.
The Select a Body dialog opens, which allows you to select the required body from the model.
| 2. | Similarly, select a second body by clicking the Body 2 input collector. |
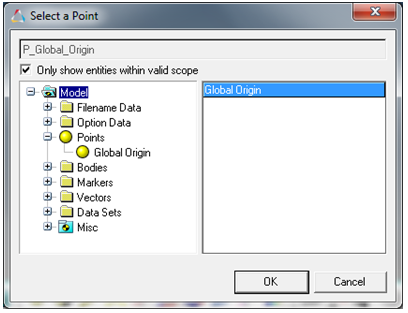
| 3. | Click the Point 1 input collector to select a point and to give the location where the spring connects to Body 1. |
Or
Double click the Point 1 input collector.
The Select a Point dialog opens, which allows you to select the required point from the model.
| 4. | Click Point 2 to select a point and to give the location where the spring connects to Body 2. |
When an AirSpringPair is added to the model, MotionView automatically reflects the modifications made to the left AirSpring of the pair to the right AirSpring also, unless chosen otherwise. MotionView assumes bilateral symmetry about the global X-Z plane. By selecting the Pair check box (in the Add Entity window) and selecting the AutoAirSpringPair from the drop-down menu, the AirSpring Pair panel is displayed in the panel area. Select the required options from the drop-down menu; MotionView will reflect those modifications respectively. The options available on the drop-down menu are:
| • | Left->Right |
| • | Right->Left |
| • | None |

Please refer to the AutoBumpStop topic for additional information.
Air spring properties are stored in a TeimOrbit format property file containing a table of the spring force verses spring height for different at different static pressures. When you submit your model to the solver, MotionSolve reads the air spring properties from the file for use during the simulation. If the units specified in air spring property file differ from the model, MotionSolve converts the air spring properties to model units, however it leaves the property file unchanged. Click here to learn more about TeimOrbit format property files.
See Also