In the Evaluate step, you will select which runs you want to evaluate and which tasks you want to perform, using the Write, Execute, and Extract options. The execution of the these runs not only allows for checking the proper creation of solver decks and execution of solver scripts, but also generates the result files to be used in the next step of the study Setup, the output response definition. In the Evaluate step you can also observe the status of the selected tasks to determine whether they are successful, failed, or previously run.
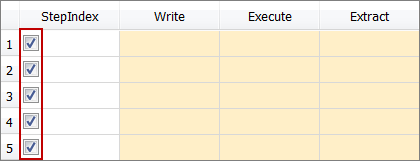
| 1. | In the StepIndex column, select the check boxes of the runs to evaluate. |
| 2. | In the Run tasks tab, select the checkboxes of the tasks (Write Input Files, Execute Analysis, and Extract Responses) you want to perform. |

| 3. | To access the following optional settings, click  : : |
| • | If you would like to receive a notification when a task is completed, activate Notify. |
| • | If you would like to execute a number of concurrent jobs, activate Multi-Execution. When selected, the Number of concurrent jobs field is enabled. You can change this number as HyperStudy is running; that is it does not have to be a static entry. Multi-execution runs jobs in vertical execution mode where each of these three tasks for all designs are performed at once; that is all designs are written, then executed, then extracted. Multi-execution is not available for Internal Math and Spreadsheet models. |
Set Multi-Execution to 0 to stop the submission of new jobs.
| • | If you would like to write the solver output in the Message Log and/or log-file, activate Log output. By default, this feature is enabled when Multi-execution is selected. |
| 4. | Click Evaluate Tasks. HyperStudy creates simulation files in the approaches/nom_1/m_i folders, where m_i stands for the ith model. |
| 5. | To stop the evaluation, click  . . |
|
In the Evaluate step you can review the input variable and output response values for each run, as well as review the run files.
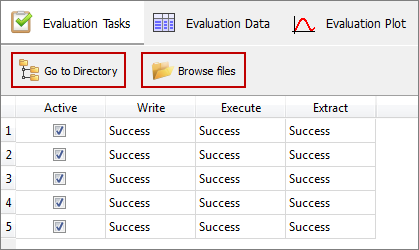
From the Evaluation Tasks and Evaluation Data tabs, you can review the run files of a particular design.
| 1. | In the work area, highlight the design you would like to review. |
| 2. | Click Browser files to open the related file directory, or click Go to Directory to show related file directory. |
|
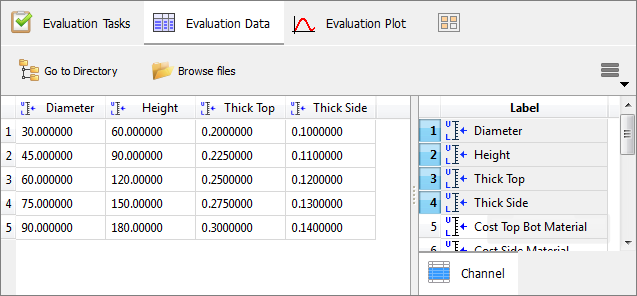
In the Evaluation Data tab you can review a tabular summary of the input variable and output response values for each run. From the Channel selector, highlight the input variables and/or output responses that you would like to display in the table.
|
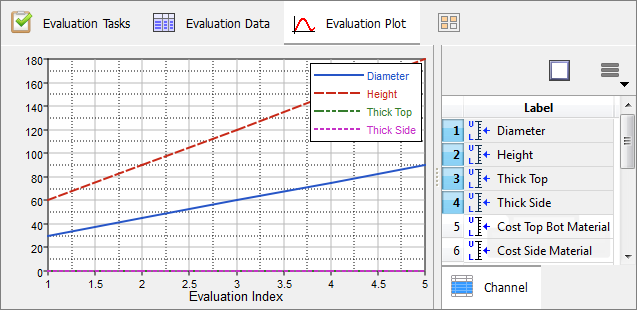
In the Evaluation Plot tab you can review a 2D chart of the input variable and output response values for each run. The x-axis represents the run numbers, and the y-axis represents the input variable and/or output response values. From the Channel selector, select the input variables and/or output responses that you want to plot.
|
|
During and/or after an evaluation, you can use the Purge tool to minimize the size of your study directory by removing unnecessary run files. The Purge tool displays a list of all the files available for purge, which are sorted by size. Any files that are smaller than 10kb will not be listed in the Purge tool because they do not pose as a problem to disc space usage.
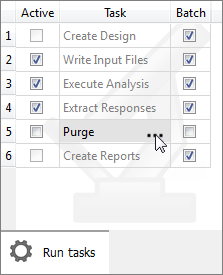
To apply your purge selection to future approaches, select the Purge checkbox from the Run tasks tab. For example, the purge selection that you make in the Study setup will be inherited by all of the study approaches. However, you can still modify your purge selection for each study approach.
| 1. | From the Run tasks tab, click  next to Purge. next to Purge. |
| 2. | In the Purge dialog, select the check boxes of the files that you would like to purge from your study directory. |
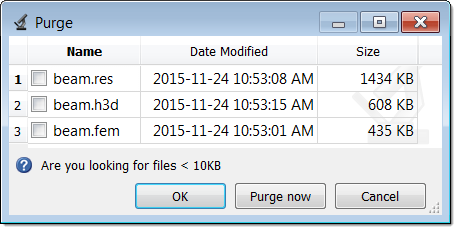
| 3. | To purge the files, click Purge now. |
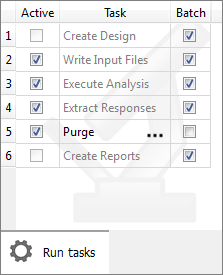
| 5. | Optional: To apply your purge selection to future approaches, select the Purge checkbox in the Active column. |
| Note: | You can still modify your purge selection for each study approach. |
|
See Also:
Tabs


