Image Planes - Overlaying Images and Videos |

|

|

|

|
|
Image Planes - Overlaying Images and Videos |

|

|

|

|
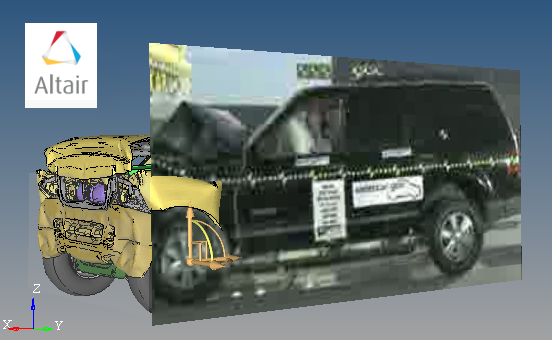
The Image Plane tab allows you to select and overlay images (such as company logos, watermarks, etc.) or videos in the graphics area for correlation and presentation purposes. Static positioning of these images with the model is available, as well as synchronization of the videos with HyperView model animations. Multiple images and videos can be loaded into HyperView, and each of these can be edited in the Image Plane tab. It is possible to load static images and video files at the same time (AVI, PNG, BMP, etc.) interchangeably on the image planes. The image planes can be 2D or 3D. A 2D plane places the media in the graphics area as a foreground or background to the models that are loaded. A 3D image plane embeds the media in the model space so that when the model view is rotated or panned, the related media will also change correspondingly. This is particularly useful for correlating simulation with multiple videos or static images that are captured with various views.

Example model with 2D and 3D Image Planes
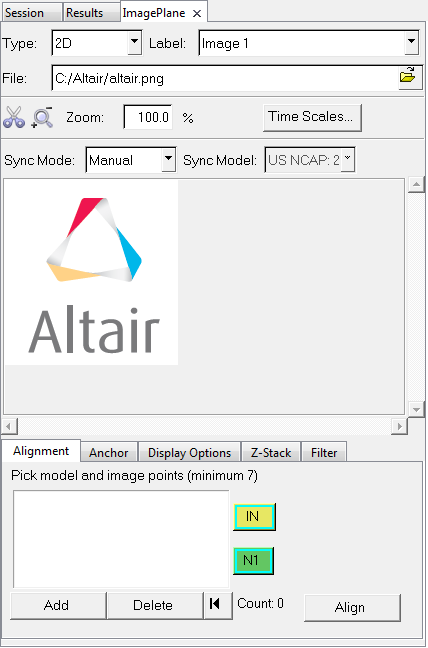
To access the Image Plane tab, right-click within the Results Browser and select Create > Image Plane (or right-click on an existing image plane and select Edit), or select Image Planes from the Annotations menu.

Image Plane tab
The width of the entire Image Plane tab can be resized to adjust for the image/video resolution. To resize the width of the browser, click on the vertical line which separates the tab from the graphic display area and drag and release the mouse button when the width is the desired size.
You can save, and later restore, the settings of image planes (position and orientation with a given model) by saving your work session as a Session File. To enable comparison of multiple sets of simulation results with each other, or against various physical test data, Report Templates will accept the image/video files as parameters for every instance of comparison. This is useful for comparing the test and simulation results, as well as comparing across variants of a design.
In addition, you can use the Apply Style To option to apply a 2D or 3D Image Plane to multiple windows. This has the effect of copying the image planes from the source window to all the target windows that require the image planes. A background image like a company logo or a test video positioned in one animation window can be quickly copied to all relevant animation windows using the Apply Style option.
H3D Export is also supported for static images. All image planes that contain background or foreground, as well as 3D planes, will be embedded in the H3D file for visual display in HyperView Player. Only static images are supported at this time.
Image planes can be created via a context menu in the Results Browser. You can also access the following context-sensitive options by right-clicking on an image plane within the Results Browser tree structure:
Create |
Allows you to create a new image plane. Any number of image planes can be created. Image planes will be listed in the Results Browser tree structure under the Image Planes folder, and each image plane will contain a single static image or video.
|
Edit |
Allows you to edit the options/settings for the currently selected image plane. The Image Plane tab is automatically displayed upon selection of the Edit option. |
Delete |
Deletes the selected image plane with a confirmation message. |
Rename |
Displays the Rename dialog, which allows you to rename the selected image plane. The image plane label is a convenient way for you to organize various media. The actual file name is displayed in the Image Plane tab (when activated by the Edit option). |
Show |
Displays the selected image plane in the graphics area. |
Hide |
Turns off the display of the selected image plane in the graphics area. |
Displays the graphical manipulator in the graphics area for the currently selected image plane. The graphical manipulator allows you to modify the location and shape of the image plane interactively. Note - The graphical manipulator is linked to the Image Plane tab, therefore the display of the graphical manipulator is turned off whenever the Image Plane tab is closed. See the Display State of Graphical Manipulators topic for additional details. |
|
Hides the graphical manipulator for the currently selected image plane in the graphics area. Note - This option is only active when there is a graphical manipulator currently displayed in the graphics area. See the Display State of Graphical Manipulators topic for additional details. |
The main Image Plane tab options and sub-tabs that are available are dependent on the type of image plane selected:
See Also