In this tutorial, the HyperMath client will be explored while in the Authoring Mode.
Step 1: Launch HyperMath.
| 1. | From the Start menu, select All Programs > Altair HyperWorks > HyperMath. |
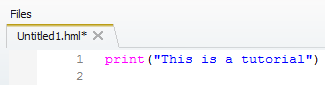
This launches HyperMath in the HyperMath GUI. Notice that by default, a file named Untitled1.hml exists in the Editor window. By default, the Authoring Mode is displayed as well.

Step 2: Enter a HyperMath command into the HML Command window and execute a command from Command History window.
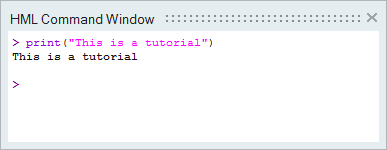
| 1. | In the HML Command window, type the following command: |
print("This is a tutorial").
| 2. | Press ENTER on the keyboard. This command results in "This is a tutorial" being printed in the HML Command window. |
In the Command History window, there is now a reference to the command that was just entered. This reference includes the date the command was entered along with the command itself.
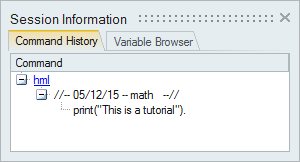
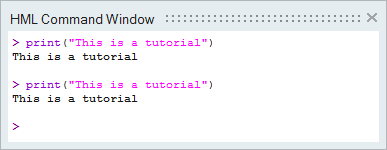
| 3. | Double-click on the command in the Command History window. The command and the result are printed to the HML Command window. |
Step 3: Drag a command from Command History window into the Editor window and add a command from the Library Manager.
| 1. | In the Command History window, left-click on the command to highlight it. |
| 2. | Using the left mouse button, drag and place the command into the Editor window under the Untitled1.hml tab. |
| 3. | Press ENTER on the keyboard to add an additional line to the script in Untitled1.hml. |
| 4. | Click on Run File,  , to execute the commands in Untitled1.hml. , to execute the commands in Untitled1.hml. |
Notice how the output is printed to the Hmath window.
| 5. | In the Library Browser, expand the folder for Basic Signal Processing and then expand the folder for Filter Analysis. |
| 6. | Left-click on MagRes and drag-and-drop the command onto the second line in Untitled1.hml in the Editor window. |
This process illustrates how commands from the Library Browser can be added to the Editor window.
| 7. | Close the Library Browser by clicking the x in the upper right hand corner. |

Step 4: Open a file from the File menu and execute the file.
| 1. | From File menu, click Open File,  . . |
| 2. | From the Open File dialog, select the Demo_Filter.hml file, located in the hmath folder, and click Open. |
This opens a new tab in the Editor window titled Demo_Filter.hml. This tab is now the active tab, indicating that this file is the active file.
| 3. | Click Run File, , to execute the file Demo_Filter.hml. |
A plot has now been created and is being displayed in the Editor window.
Step 5: Open a file from the File Browser and execute the file.
| 1. | In the File Browser, verify that the path is set to the folder <your tutorial file location>/tutorials/hmath. |
| 2. | Find the file Demo_Matrix.hml in the list of available files. Right-click on the file and select Open. The file can also be opened by dragging the file from the File Browser into the Editor window. |
| 3. | Right-click in the Editor window while in the Demo_Matrix.hml tab, and select Run File. This is another way to execute the active file. |
In addition to a new plot being created, there is also a lot of output written to the HML command window.
| 4. | Close the File Browser by clicking the x in the upper right-hand corner. This provides more room to view the items in the Editor window (files and plots). |
Step 6: Collapse and expand items using the Outline toolbar.
| 1. | In the Editor window, click on the tab for Demo_Filter.hml to make this the active file. |
| 2. | Select the Home tab and place your mouse over the Outline toolbar,  . When you hover mouse over the toolbar, there are additional options: . When you hover mouse over the toolbar, there are additional options: |
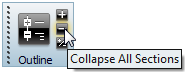
| 3. | Notice that a while statement is located at line 14. As a result, there is an outline located at line 15. Click on Collapse All Sections in the Outline toolbar. Notice how lines 14-18 are hidden as they are located inside the while loop. |
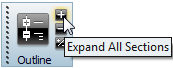
| 4. | Click Expand All Sections to view lines 14 -18. |
Step 7: Add bookmarks and scroll through the bookmarks.
| 1. | In the Editor window, click the Demo_Matrix.hml tab to make this the active file. |
| 2. | Using your mouse, place the cursor at line 1. Click Toggle a Bookmark,  , in the Bookmark toolbar. This adds a bookmark at line 1. Notice the blue marker added in the left column. , in the Bookmark toolbar. This adds a bookmark at line 1. Notice the blue marker added in the left column. |
| 3. | Repeat step 2 and add bookmarks at lines 10, 20, 35, and 41. |
| 4. | Click the Goto Next, 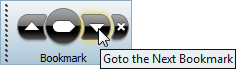 , and Goto Previous, , and Goto Previous, 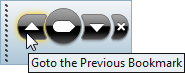 , buttons on the toolbar. This allows you to scroll between the various bookmarks. , buttons on the toolbar. This allows you to scroll between the various bookmarks. |
| 5. | From the View menu, select Bookmarks to launch the Bookmarks Utility. |
This launches a new window that lists the various bookmarks and the file that they are associated with, as well as the line numbers.
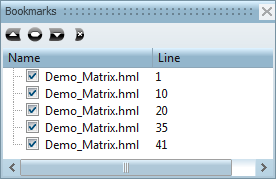
| 6. | Uncheck the box next to the bookmark for line 1. This disables the bookmark. Use the Goto Next and Goto Previous buttons, either in the Bookmarks Utility or from the Bookmarks toolbar, to scroll through the bookmarks. |
| 7. | Click Clear all Bookmarks, 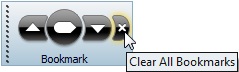 , either in the Bookmarks Utility or from the Bookmarks Toolbar, to remove the bookmarks. , either in the Bookmarks Utility or from the Bookmarks Toolbar, to remove the bookmarks. |
| 8. | Select Yes to the Clear all bookmarks prompt. |
| 9. | From the View menu, select Bookmarks to close the Bookmarks Utility. |
Step 8: Use the Tcl Command window to evaluate Tcl commands.
| 1. | From the View menu, select Tcl Window to launch the Tcl Command window. This launches an additional window where Tcl commands can be entered. |
| 2. | In the Tcl Command window, type the following command: |
set a 1
This sets the value of variable a to 1.
| 3. | Press ENTER on the keyboard. |
| 4. | Type in the following command: |
puts $a
This command prints the value of variable a.
| 5. | From the View menu, select Tcl Window to close the Tcl Command window. |
Step 9: Display the File Browser and the Library Manager.
| 1. | From the View menu, select File Browser to launch the File Browser. |
| 2. | From the View menu, select Library Manager to launch the Library Manager. |
Step 10: Save the project to your desktop.
| 1. | From the File menu, select Save As. |
| 2. | For Save as type, click the drop-down menu and select Project (*.aprj). |
| 3. | Browse to the Desktop and enter a filename. |
| 4. | Click Save to save the project. |
By saving the project, all files and plots that are in the current session can be retrieved at a later date.
Step 11: Delete the plots and close the HyperMath script files.
| 1. | In the Project Browser, right-click the Plots folder under Script 1 and select Delete Plots. |
This deletes all plots from the Project Browser and the Editor window.
| 2. | Still in the Project Browser, right-click the Files folder under Script 1 and select Close Files. |
| 3. | Click No to the message that prompts if you want to save Untitled1.hml. |
This closes all files in the Editor window, but leaves Demo_Filter.hml and Demo_Matrix.hml in the Project Browser.
| 4. | Right-click the Files folder under Script 1 again and select Remove All to remove the files from the Project Browser. |
See Also:
HMath-1000: Editing, Executing, Saving, and Plotting in HyperMath
HMath-1020: Working with HyperMath Debugging Mode
HMath-2000: Working with HyperMath – Arithmetic and Relational Expressions and Control Structures
HMath-2010: Working with HyperMath – Logical and Relational Expressions and Control Structures
HMath-2020: Working with HyperMath – Functions and Matrix Operators
HMath-2030: Working with HyperMath – Plot Commands
HMath-3000: Working with HyperMath – String Library
HMath-3010: Working with HyperMath – Input/Output Library
HMath-3020: Working with HyperMath – Input/Output Library Continued
HMath-3030: Working with HyperMath – Batch Mode
HMath-4000: Using HyperMath Functions for Curve Fitting
HMath-4001: Using HyperMath for Material Characterization
HMath-4010: Solving Ordinary Differential Equations
HMath-4020: Solving Differential Algebraic Equations
HMath-4030: Optimization Algorithms in HyperMath
HMath-5000: Using HyperMath in HyperView Results Math
HMath-5001: Post Processing Results from FEA
HMath-5002: Registering a Function in HyperGraph 2D
HMath-5003: HyperMesh-HyperMath Cross Execution of a Tcl Script
HMath-5004: HyperMesh-HyperMath Cross-debugging of a Tcl Script


